
Back in March, I setup piHole on an Amazon EC2 instance. If you are new to AWS, you can get a year of the smaller EC2 server instances to use for free for 1 year. Afterwards, it is pennies per day depending on what size you build. Super neat. Save on power, pi and random cables, and can use it outside of the home on a phone if you are out about.
When the winter storm ravaged the high speed connectivity in Texas which led to oversaturation of mobile towers, I was not able to use my piHole, which was installed on a Raspberry Pi, to block ads as my main ISP was down nor was I able to convert my adblocker over to my mobile phone. However, if I had been able to access my piHole and use it on my mobile device, it would have improved my internet experience by not downloading ads that slowed down the limited bandwidth due to the oversaturation. In theory, with a piHole running within the cloud, should disaster hit, a person could optimize internet traffic via the phone or a hotspot that way.
That’s when I noticed that someone had already done that and written a guide on it.
https://medium.com/@dion315/setting-up-a-free-pi-hole-on-aws-c24511888973
The article is excellent and a great starting point, but I had to tweak it for my own usage. Here are a few tips to reduce your costs and improve your experience. I started with a t3.micro which is 2 cpus, 1 gb of memory, and an 8 GB SSD. Once the free tier expires it is about 1 penny an hour.
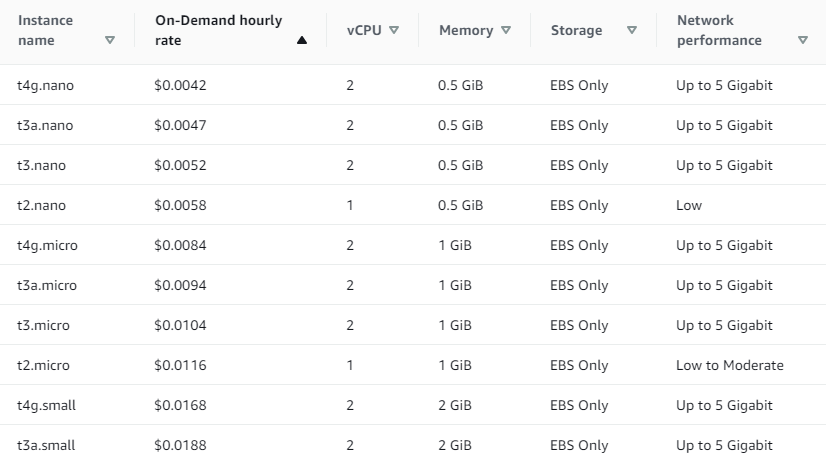
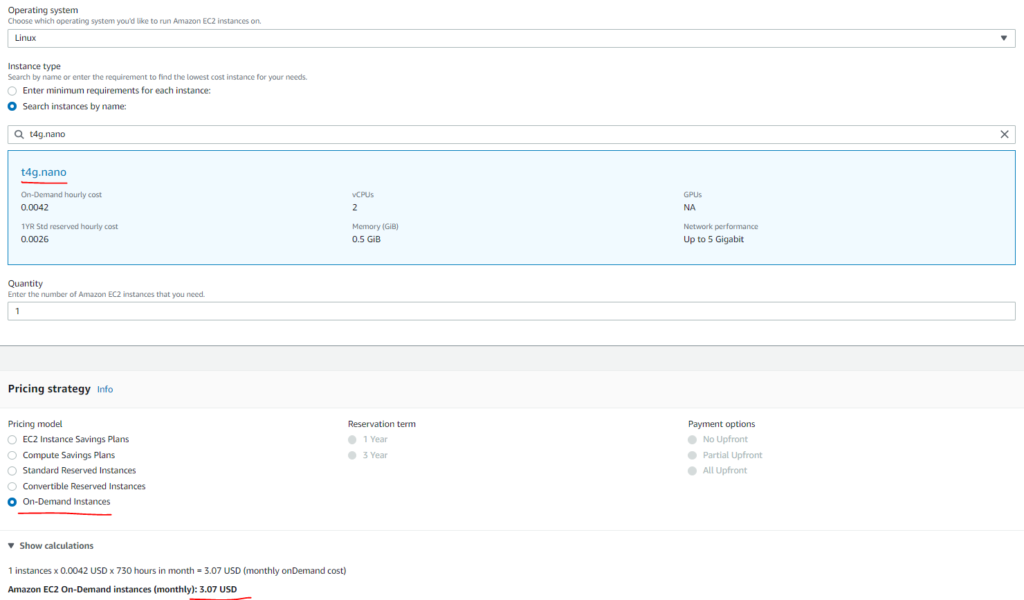
However, that turned out to be overkill as piHole uses only a fraction of those resources. Because my free tier membership had expired, I converted to the t4g.nano. That has the lowest cost instance at less than half a penny per hour and gives more than enough resources.
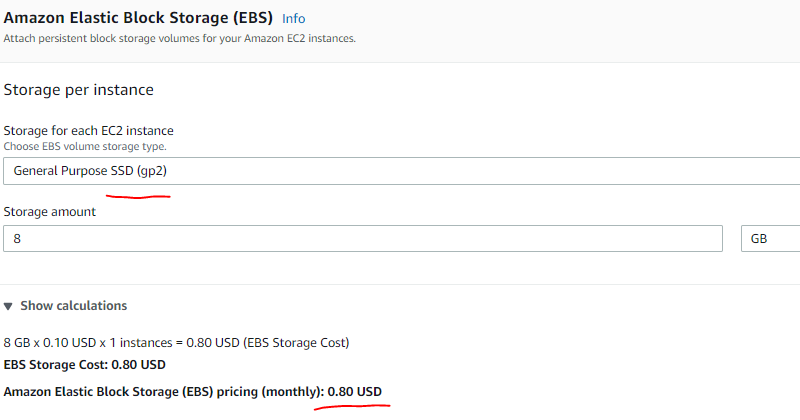
The other associated cost is the storage which for an SSD is a flat rate of $0.80 a month. Keep in mind this is five 9’s of protection at 99.999% durability. For your own peace of mind that means you can set and forget.
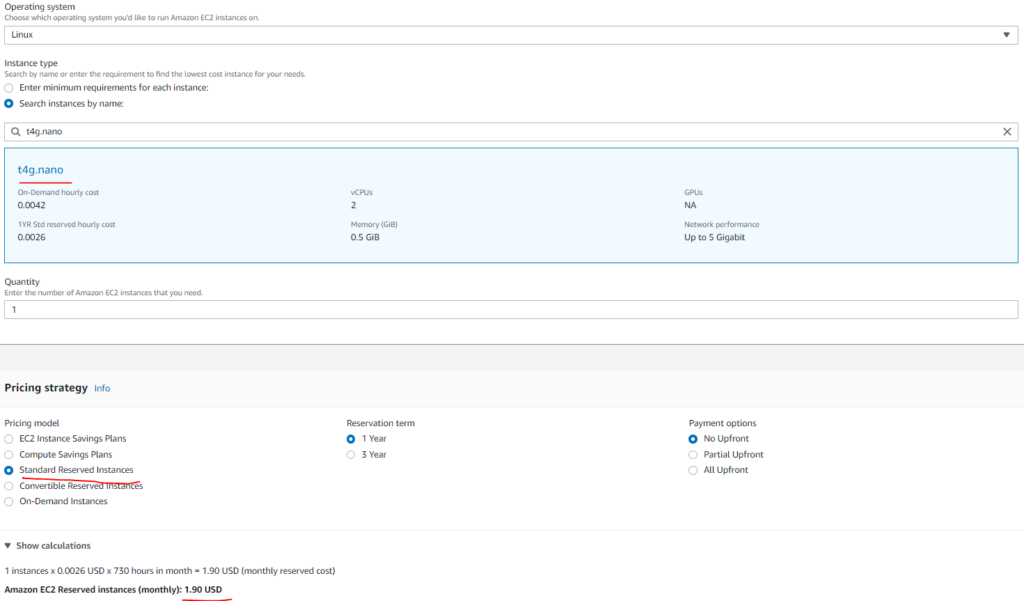
The t4g.nano has 2 cpus and 512 MB of memory. For equivalency, that is about equal to a Raspberry Pi3b if you compare based off of memory. What’s even better is that piHole is very resource efficient and uses about half of that amount so roughly 256 MB. If you decide that you like it and want to lower your costs even further you can setup a reserved instance which will decrease your monthly costs even further ($3.07 vs $1.90)
A major point which was not emphasized in the article was access. I also had to modify the security groups so that only my WAN IP, VPN IP, and my phone’s IP were allowed. Initially, as soon as I set this up, I was immediately having people connect to my piHole and trying to use it to flood the peacecorps.gov. Also, another important point is to get an elastic IP so that your IP never changes. They are free as long as the EC2 instance is turned on. This way you can always connect up to it via a single IP that never changes, but if you want to up your ease of management even further, you can associate it in Route53 as well as a domain. That means you don’t need to remember any numbers at all. Just your domain and your name of your piHole instance.
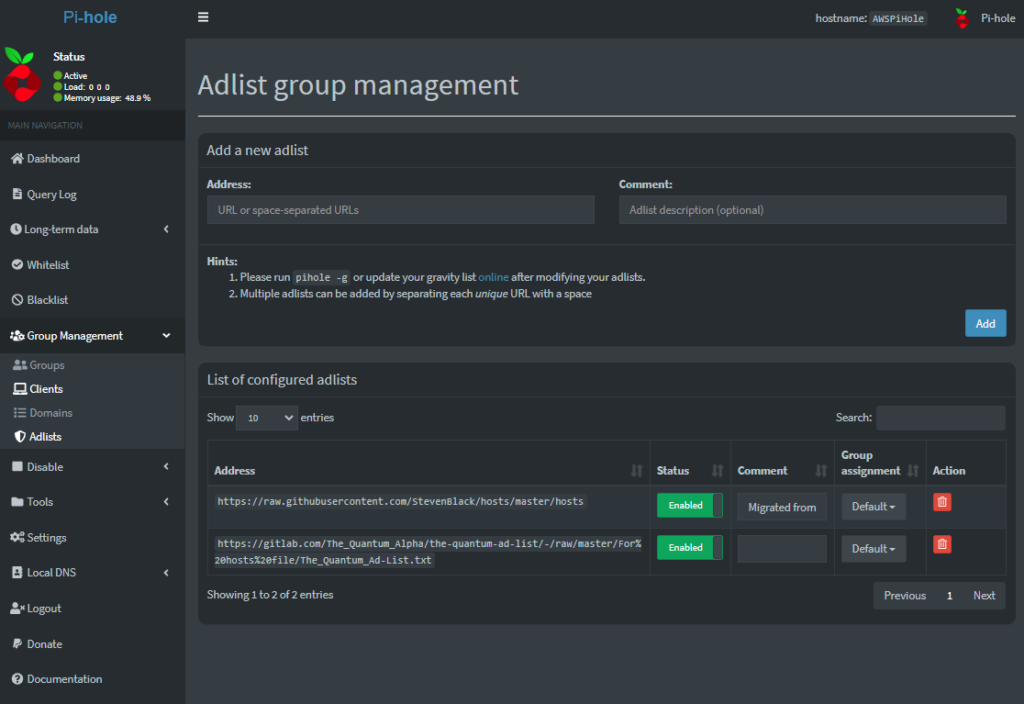
One other thing, when you add configured Adlists, a popular one that myself and much of Reddit uses is “https://gitlab.com/The_Quantum_Alpha/the-quantum-ad-list/-/raw/master/For%20hosts%20file/The_Quantum_Ad-List.txt“
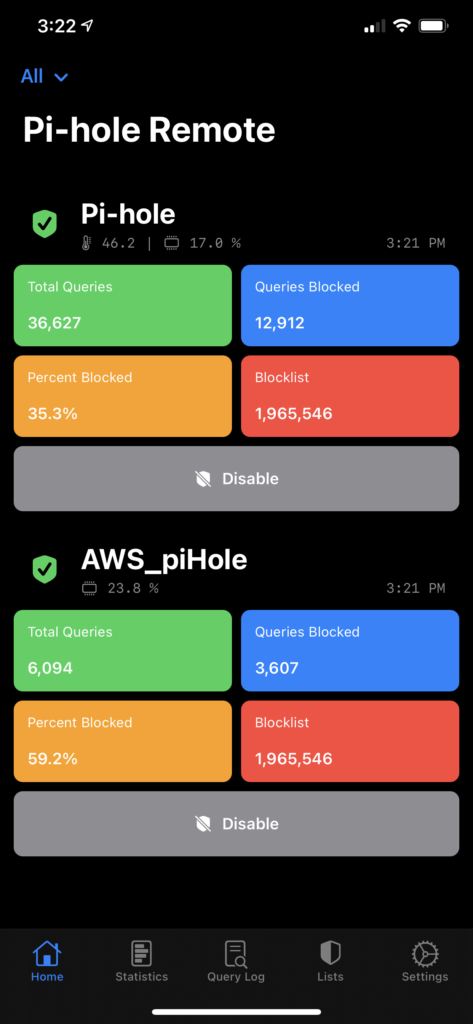
Also, if you have an iPhone, grab the apps for “AWS Console”‘ as well as “Pi-hole Remote” from the Appstore and manage it that way too.
Have fun, but remember in the beginning to login often and make sure everything looks good. After all, you don’t want unwanted people using it unless you want the associated costs too.
-Palvaran