
TL;DR: I made a completely new website and then migrated from my paid AWS infrastructure to a free OCI one. The first revision I did of this article was using documentation from Ubuntu on setting up WordPress which worked well except it did not have clear instructions for getting SSL certificates to work. However, Linode has some great documentation that is very thorough on the entire build process. As such, the majority of this article is using their steps from setting up a LAMP Stack to installing WordPress to implemeting SSL via CertBot configuration. The combined documentation for all of the commands used in this step by step process can be found on my GitHub.
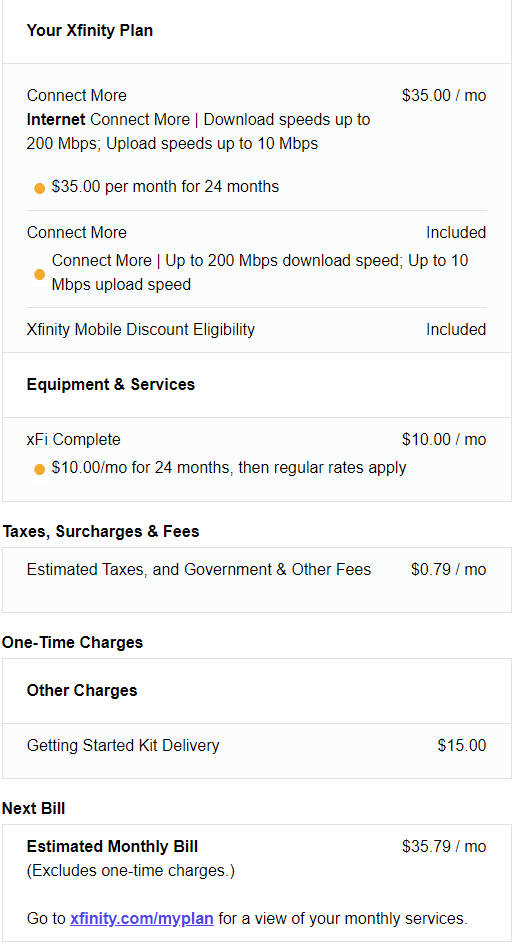
With prices having gone up for so many things I made the same choice as many others, to try to reduce any spending. I started with my cable bill which was $73.38 a month for 400 Mbps service with a 1.2 TB cap. Currently, Xfinity is running a promotion where you can have 200 Mbps internet with a 1.2 TB cap for $25 a month if you sign up and pay using a bank account. That’s a pretty sweet deal, but if you commit to an xFi box for $10 a month extra you have the 1.2 TB cap removed. Without it, the normal unlimited cap is an extra fee of $30 per month.
However, Xfinity is not the main purpose of this article. The primary point was that I have been paying for AWS infrastructure for years and while it has been reliable the current economic conditions have caused me to look around. As a consequence, I decided why not move over to a free resource via OCI. Afterall, in a previous article, I did build servers and a how to guide on it.
Cloud Costs and Reasoning
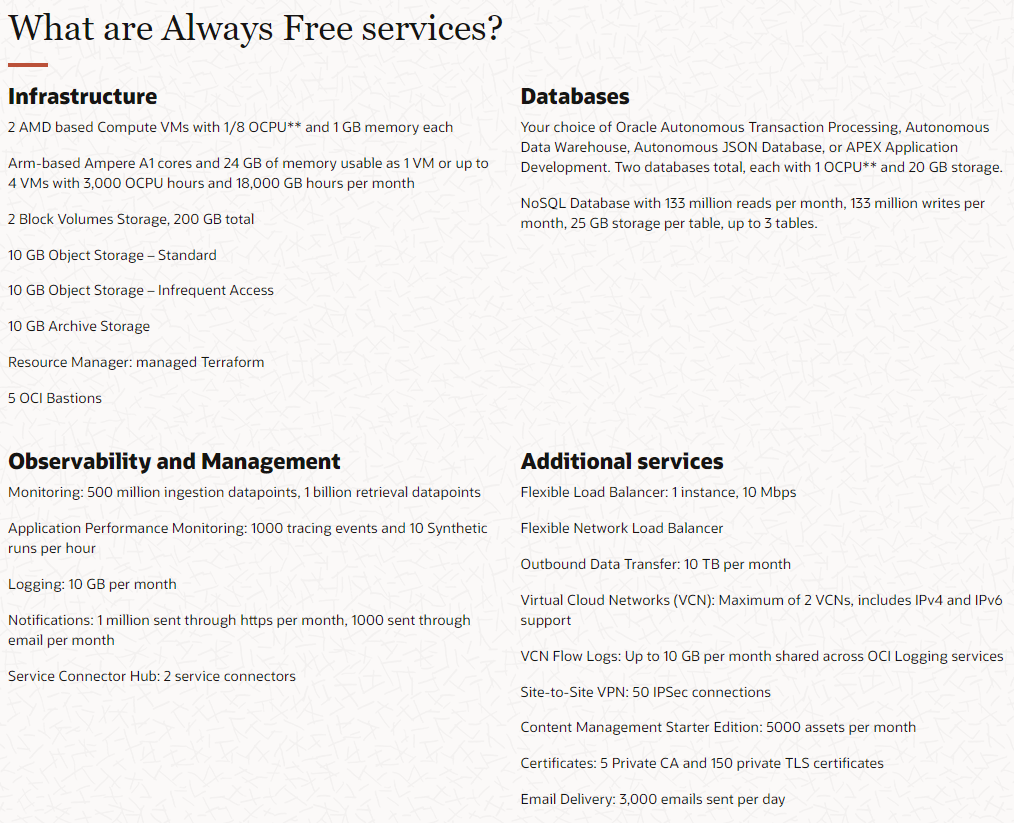
As a reminder, OCI, or Oracle Cloud Infrastructure, provides Always Free Resources which is different from what other vendors such as AWS and Azure provide. Regarding a server instance, AWS and Azure provide instances that are free, but only for 12 months rather than free forever. Moreover, even then for Azure it is limited to B1s which is limited to 1 cpu and 512 MB of memory while AWS is limited to a t2.micro which is 1 cpu and 1 GB of memory. Comparitively, OCI gives you upto 4 cpus and 24 GB of memory. Here is a chart listing some of the services that are Always Free.
After having built infrastructure in AWS, GCP, Azure, and OCI, I can say that they are all really good and have their comparitive strengths and weaknesses. Given the choice between multiple providers, when you are looking at the best choice for you, one of the factors will probably be the amount of resources expended to get into that ecosystem whether it be time or money. In this case, OCI wins in the cost category for our projected scope or work. Regardless, all in all, I think OCI does well.
If interested you can read more or sign up here. Now it is time to get started with our build out.
Virtual Machine Creation
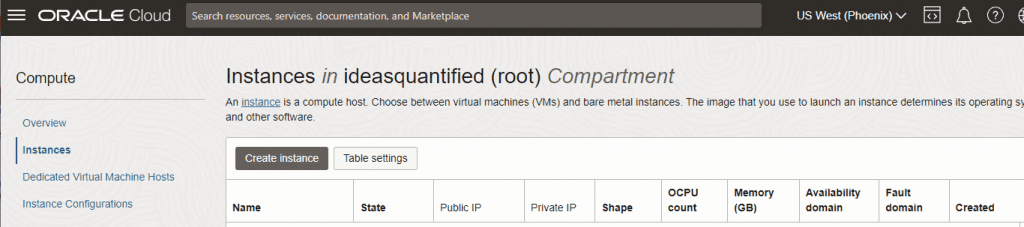
First, login to the Oracle console. When you do, it will look similar to this.
For purposes of this article we are going to deploy the resources manually, but you can have Oracle do it for you by choosing the Quickstart “Deploy a WordPress website.” It will jumpstart you to the WordPress login by using automated scripts to build out the Virtual Machine with WordPress. The primary difference is that the Quickstart will provide you with an Oracle flavor of Linux and it will give you a traditional x86 processor rather than an ARM processor. For most that does not matter, but pay attention to your code and programs to make sure they are compatible with the processor type.

Click the hamburger menu (the three horizontal lines) in the top left of the screen and go to Instances.
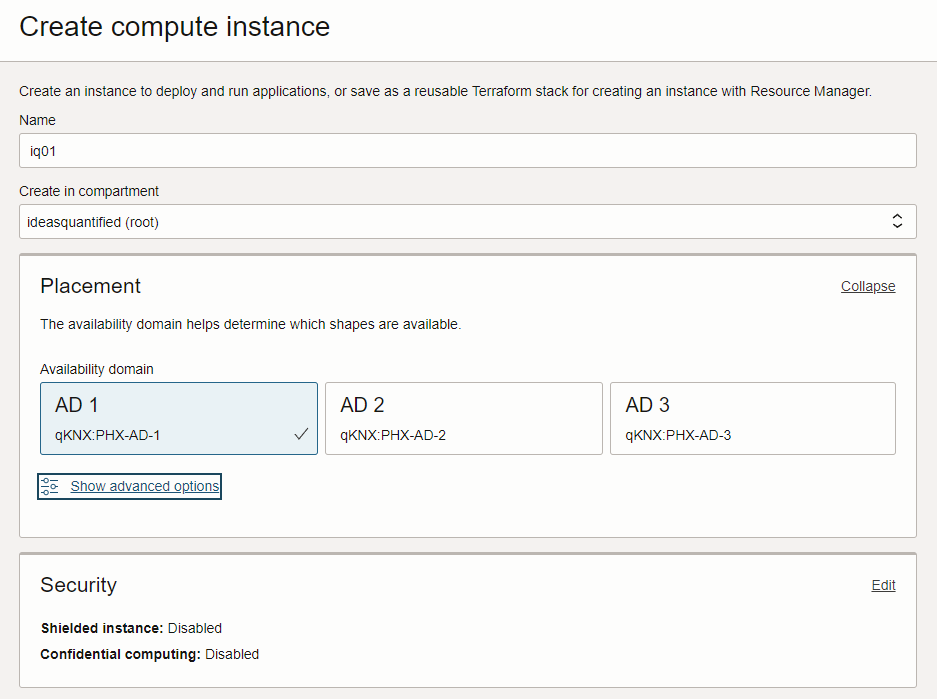
Click create instance. Enter a name for your Virtual Machine and choose an Availability Zone. As a reference, an Availability Zone is a geographic region that has multiple datacenters for redundancy. If you were wanting to build out your infrastructure, you would want to put multiple servers separated out between the Availability Zones in case one went out. In our case, we are running a free resource and it is not as mission critical.
Next, choose the Image and the Shape. Image is the operating system and shape is the hardware under the operating system which can be Intel, AMD, or an ARM processor.
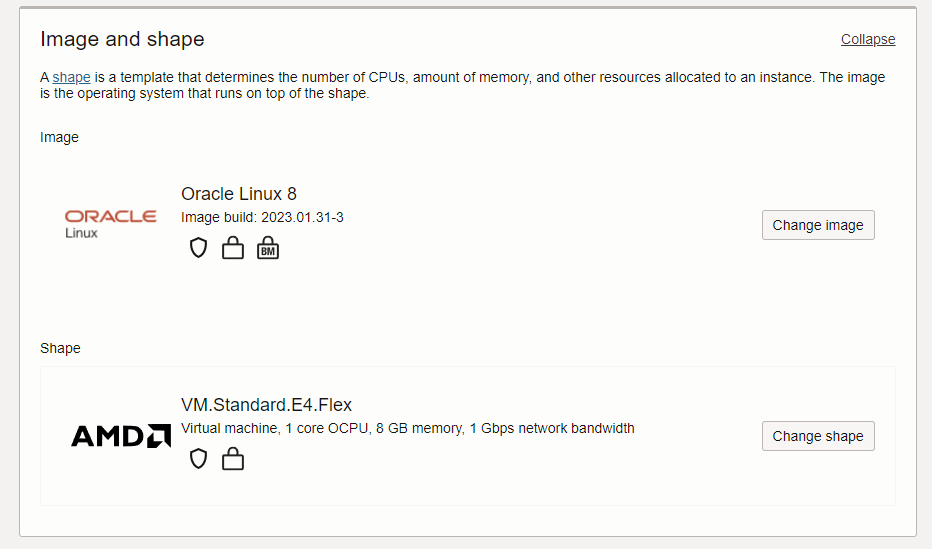
Click change image and choose Canonical Ubuntu 22.04 instead of Oracle Linux. Oracle Linux is good, but it does not allow certain commands to work due to the customizations.

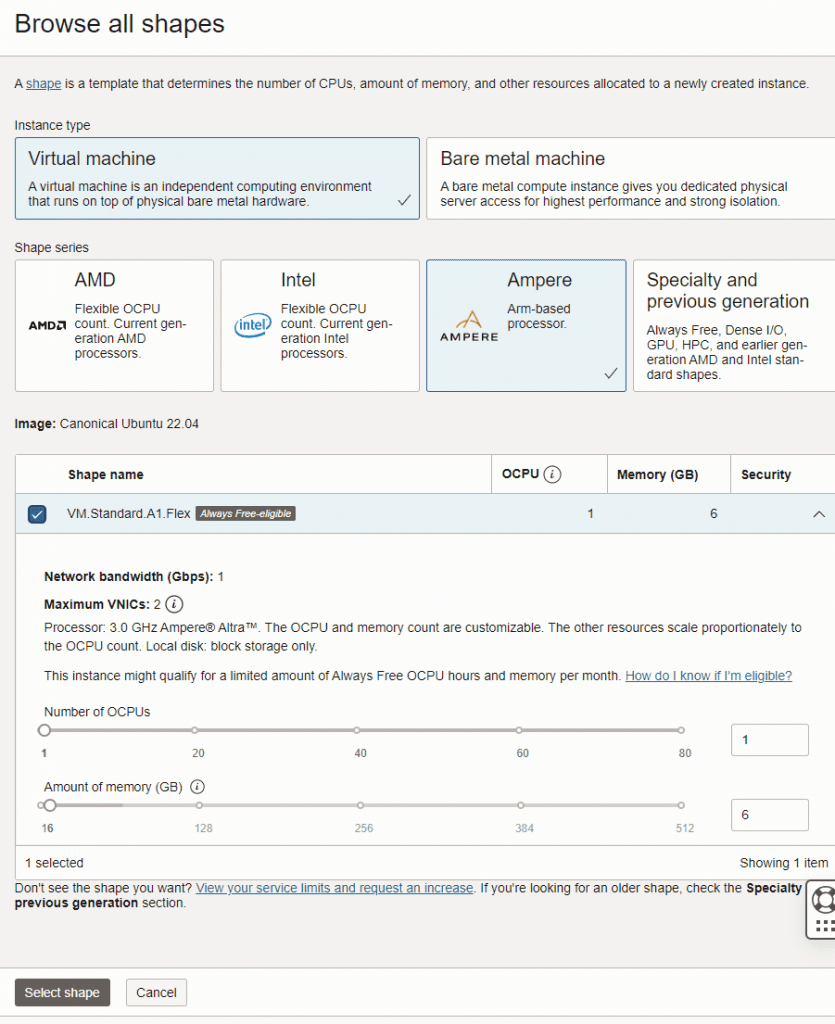
Next, change the shape and navigate to the Ampere which is an ARM processor that runs pretty well. If necessary, you can have up to 4 of them using the Always Free Tier. In this case, choose 1.
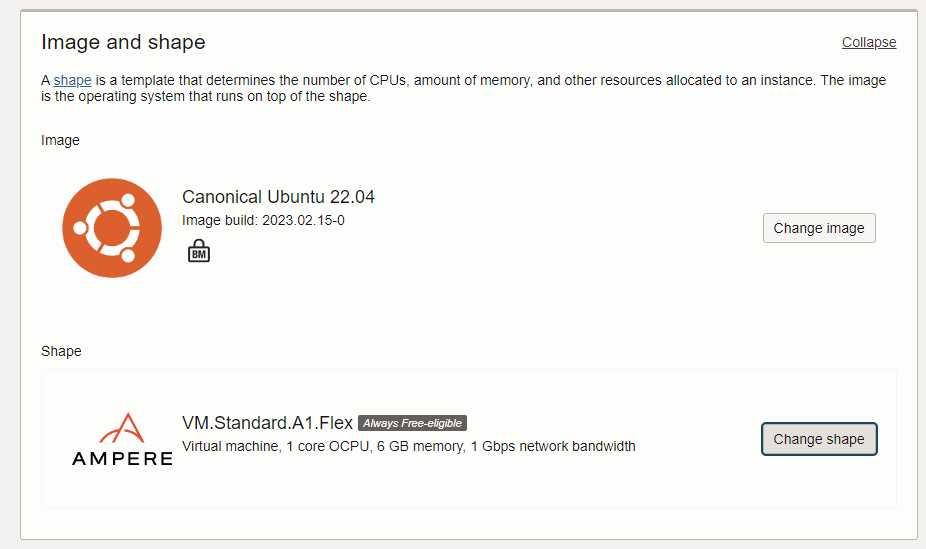
When you are done with image and shape it should look like the following.
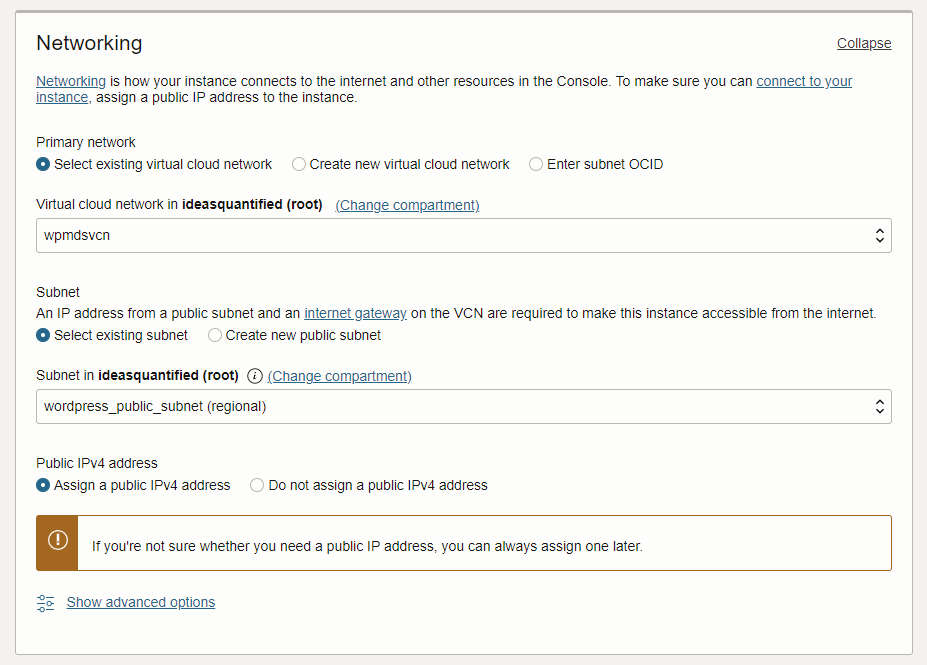
Next choose networking. If you remember in the first OCI screenshot of the default home screen on the Console it had a Quickstart for Deploy a WordPress website. If you were to click it then it would create a default network with the settings below that allow incoming traffic on ports 80 (HTTP), 443 (HTTPS), and 22 (SSH). Otherwise, you will need to build them manually.
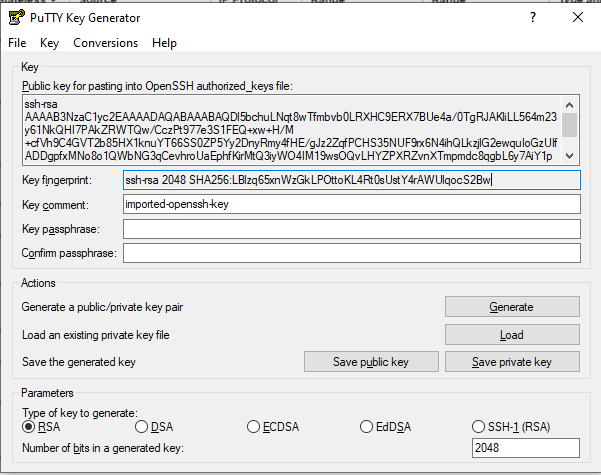
Next, generate your SSH keys or upload the public key from a key you are using now. When you download the private and public keys, you will need to load them up in PuTTYgen to convert them into a format PuTTY can use.

Click create and then it will let you see the progress which will take less than a minute.
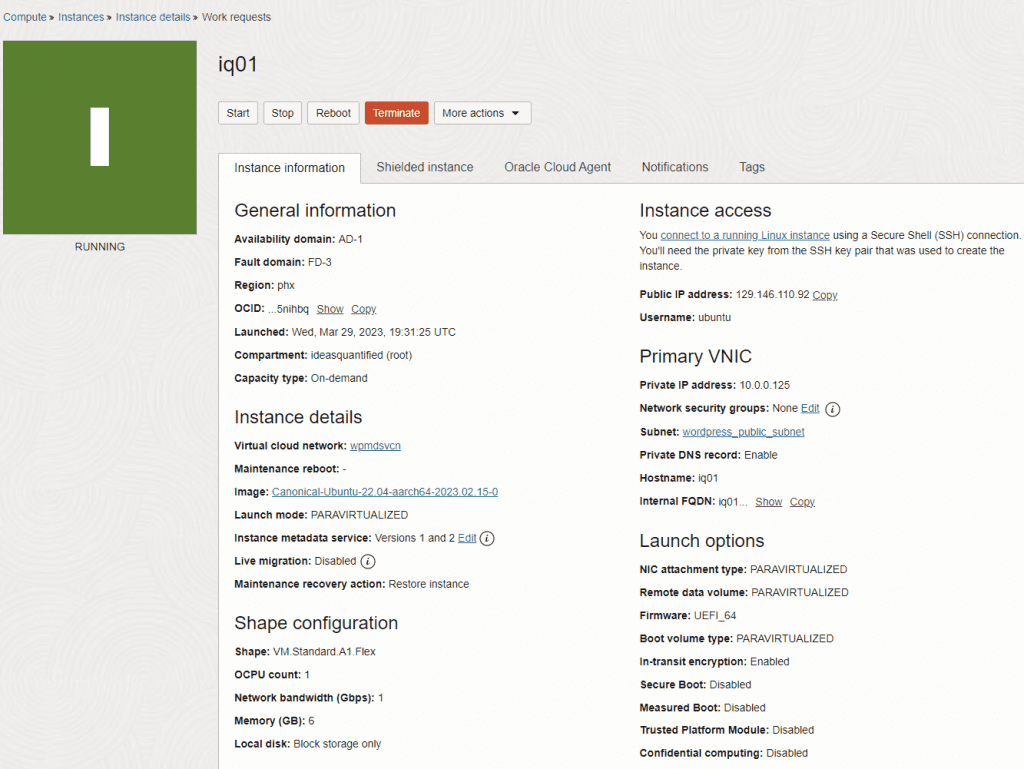
When it’s done you can then see it in the console. Note, I redid this documentation four times. This is from my first attempt before I was able to grab an Ampere processor. Sometimes, resources are not free or available at a specific datacenter. All you can do is retry later. In any event, I wanted to show what the console looks like.

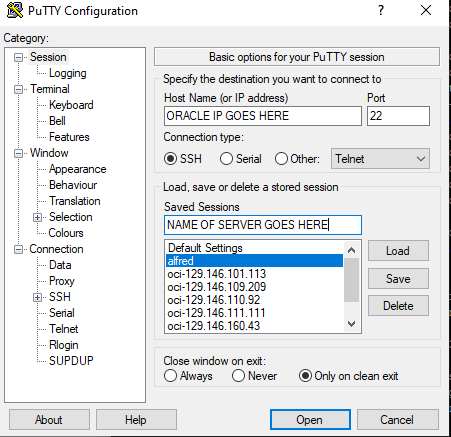
If this is your first time using OCI, you are doing great. Congratulations as you just built your first VM on a new cloud. Now you just need to login to your server. If you are using PuTTY, you can make a new Host Name and give it an IP address.
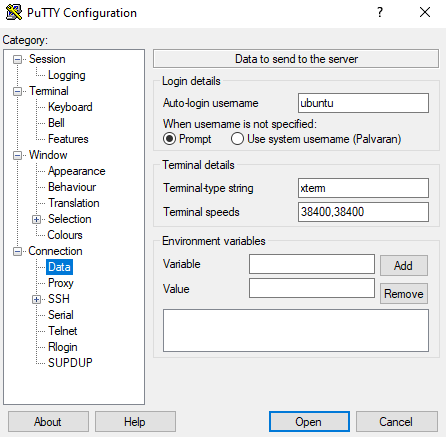
If you are using Ubuntu you can change the name to ubuntu and if using Oracle you can change it to opc.
Link to where you stored the Private Key.
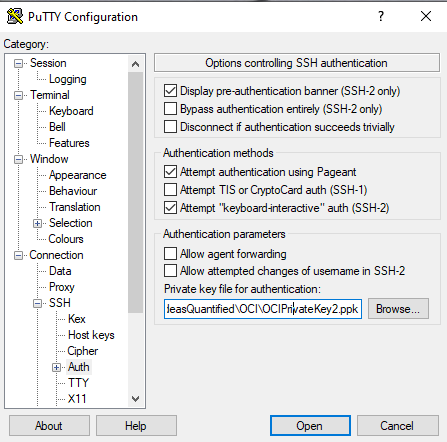
As a reference point, the keys from OCI will need to be run through PuTTYgen. Just click Load and point it at the file, then save the private and public keys. The private key is what will be linked in PuTTY and the public key is what you can use in the future to upload to Oracle or to another cloud.
Tweaking the OS and installing the Applications
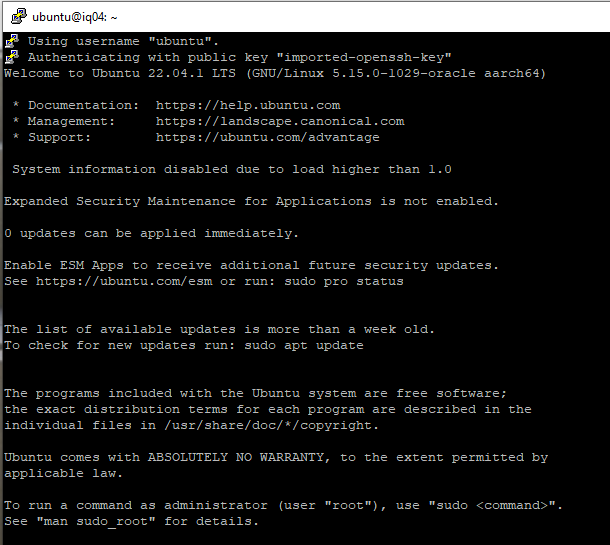
Finally, if all has gone according to plan, you can login.
The first revision I did of this article was using documentation from Ubuntu on setting up WordPress which worked well except it did not have clear instructions for getting SSL certificates to work. However, Linode has some great documentation that is very thorough on the entire build process. As such, the majority of this article is using their steps from setting up a LAMP Stack to installing WordPress to SSL via CertBot configuration.
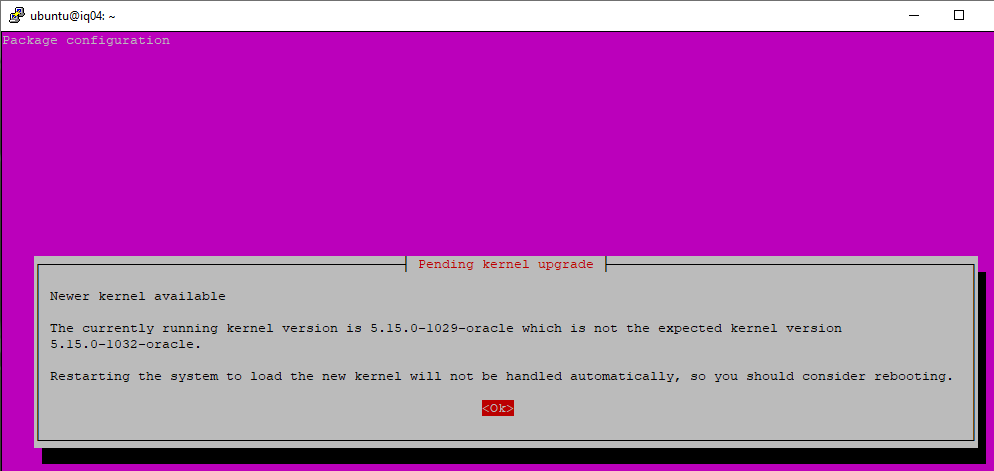
The first thing I always do on a new system build out is to patch it.

When you do, it will let you know there are some kernel changes. Just click ok.
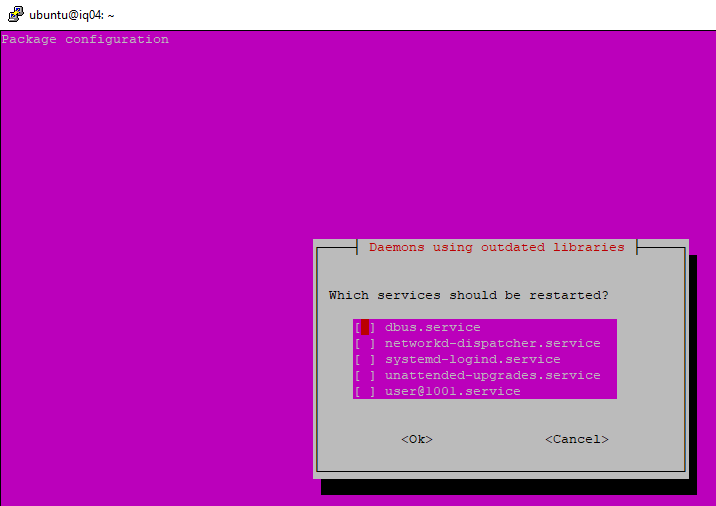
Click ok to restart the services afterwards.
Now it is time to install the Apache Web Server.

Next, install the MySQL Database.

Now install PHP.

More PHP.

Still more PHP.

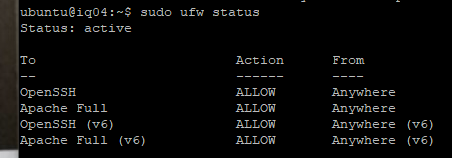
Now it is time to update the firewall rules.


Now verify and check the firewall rules. It seems tedious at times, but if this is not working then you won’t be able to access the WordPress site on ports 80 or 443.
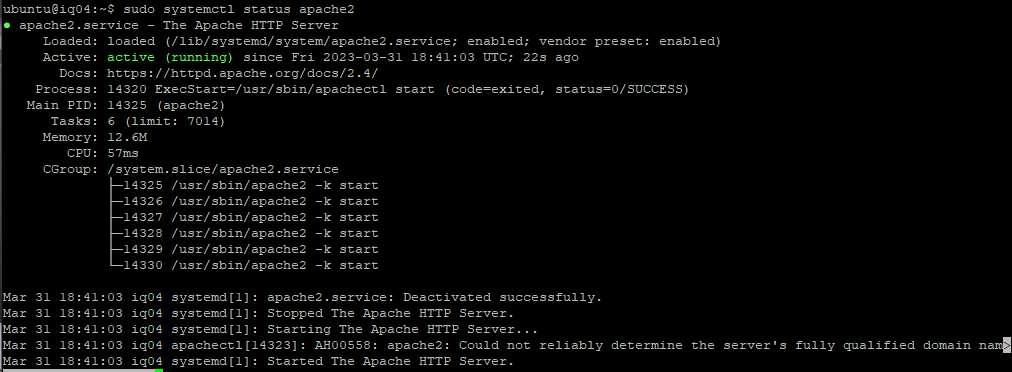
Restart Apache to load the new changes.

Verify Apache.
You don’t need it since you restarted the service, but I like to reboot at certain points such as when I am finished with a particular stage such as patching, application installs, etc. Additionally, the reboot only takes about 20 seconds due to the speed of the SSD.

Let’s just verify our IP one more time and then we can try to test the website. You can use the Oracle Console or enter the following command.

Now let’s verify if the webserver is running by using the IP from our curl command.
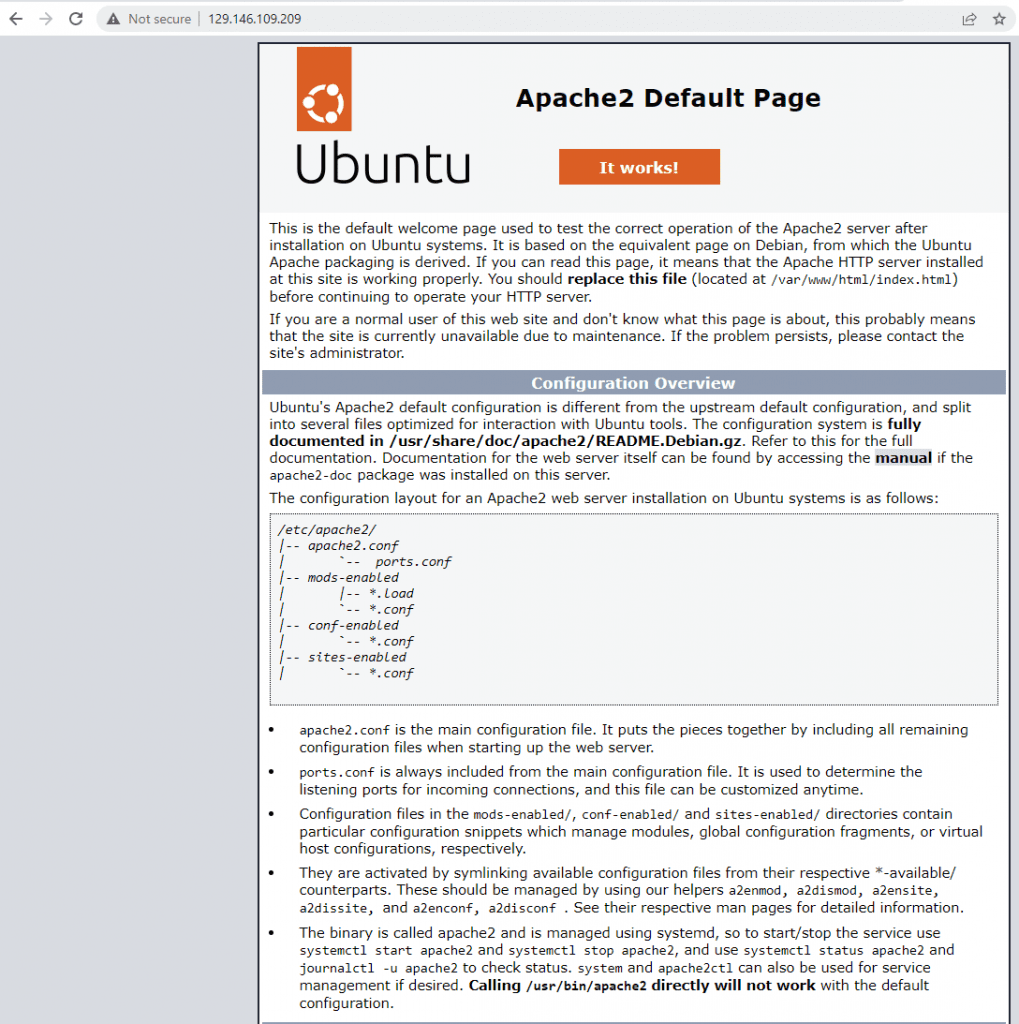
Awesome work getting to this step, especially for the first time Linux users. You are doing wonderful. The site is not secured yet with SSL, but we will get to it in time. Now it is time to keep going.
Setup and tune the Database
Next step, configure MySQL. Start by logging in.

Next up, create the database.

Now, create the user that will be writing the blogs and articles from WordPress into the database. You can change the wpuser to another user and make sure to use a strong password that is not being reused from somewhere else. Ideally, you can store your passwords in a vault ala KeePass or bitwarden.

Now add the permissions for the user to access the database. Be sure that the user matches with what you just created.

Clear the priveleges.

Nice. The database for WordPress is done. Let’s exit out now.
Now we need to reset the root password. Login to SQL one more time.

Update the password.

One final step for the database. Let’s go ahead and secure it a bit more. It does hold your important information after all.

Enter N to not change the password since our estimated password strength is 100.
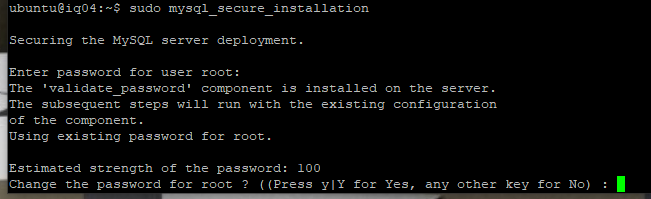
I answered Yes to all of the prompts.

Finally, SQL is done. We created a database, a user account to login, protected our root account, and tightened up security more. We are halfway done! We just need to setup WordPress and get our SSL certificates working, but first up, we need a bit more PHP.

Restart your Apache webserver for the changes to take effect.

Create a directory for downloading WordPress.

Change to the directory.

Now, download WordPress.

Unzip the WordPress file.

Move the file to a publicly readable folder.

Update the ownership and permissions.

Configure WordPress
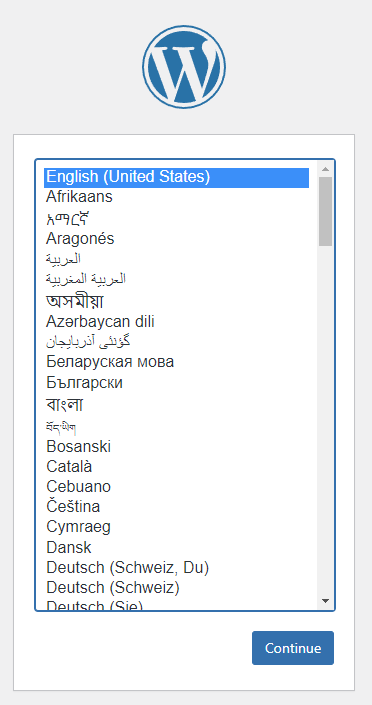
Now the pretty part begins. Choose your language.
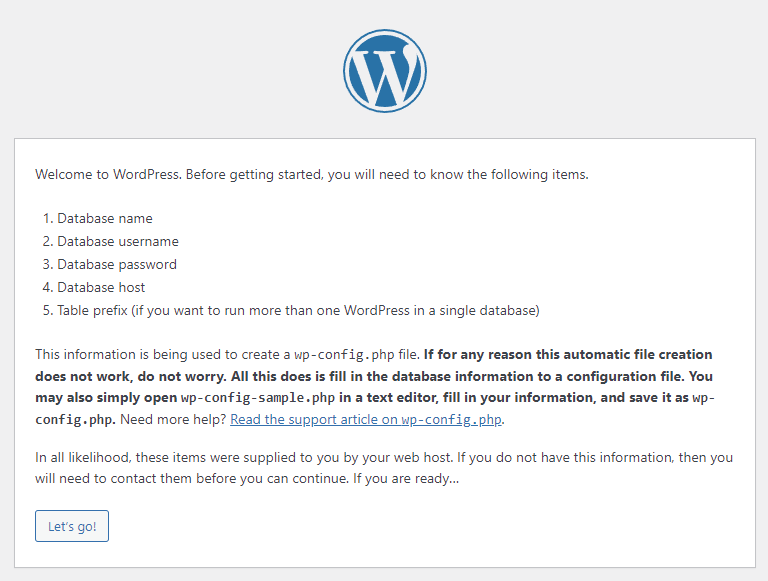
Here are the steps we are going to be doing.
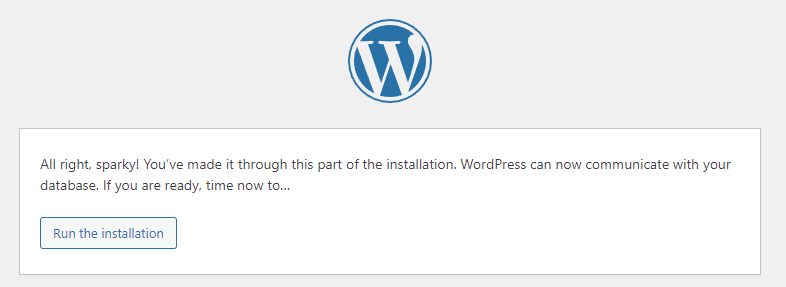
Enter your Database Name, Username, and Password from the Database creation steps we did previously. Do not modify Database Host or Table Prefix.

Bam. Good job. You did it!
Now, the important part. Choose a name for your website, but a different username than you used for creating the database. Make sure to use a unique password that is long. Then, hit Install WordPress.
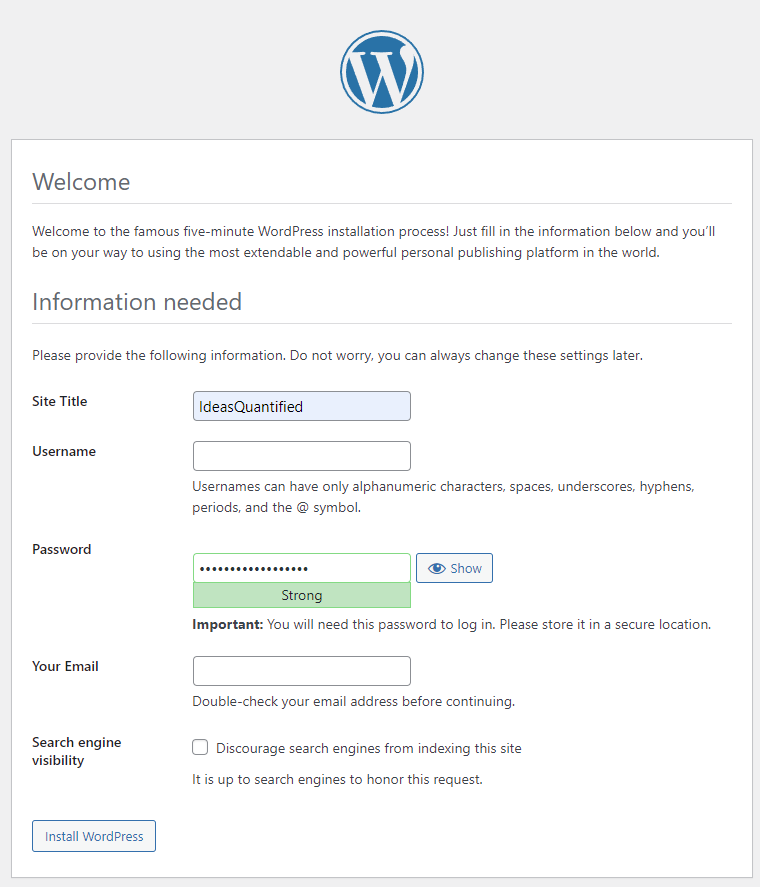
Go ahead and login.

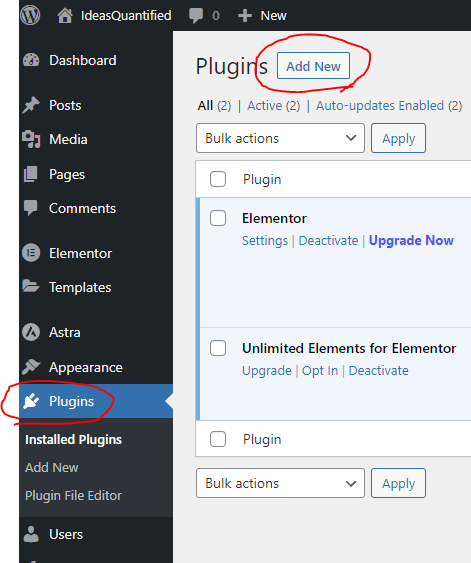
For the purposes of this article, I won’t go into the how to use WordPress or write posts, as my focus was on setting up the infrastructure for a free server. However, for the migration, you can use two plugins — WP Maximum Upload File Size and All-in-One WP Migration. Let’s start by grabbing WP Maximum Upload File Size. Hit Add New in the Plugins section.
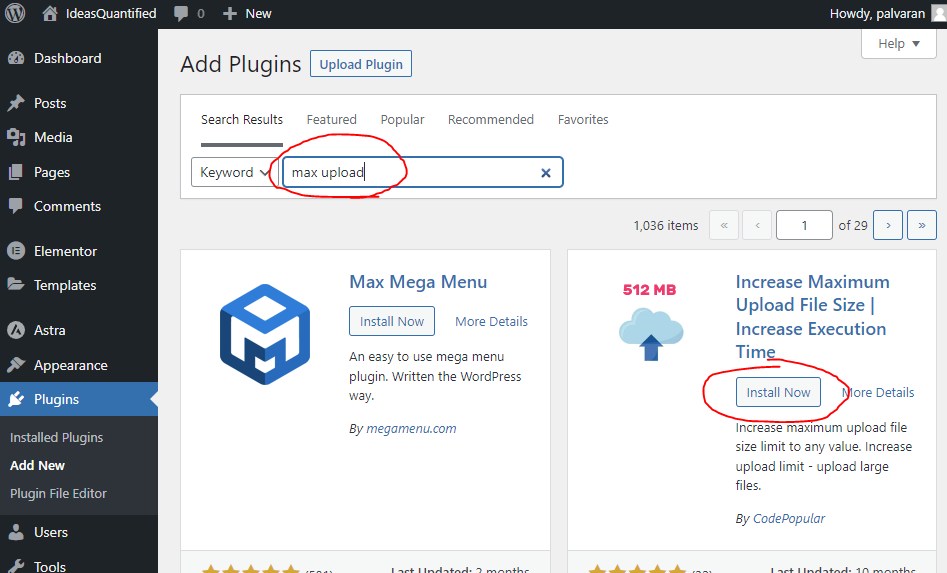
Type Max upload and hit Install Now.
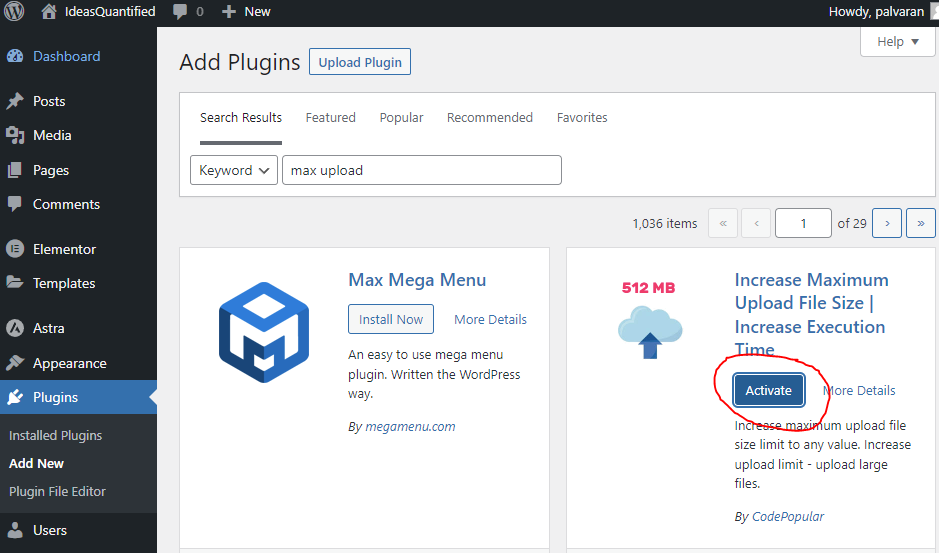
Wait a few seconds and after it installs it will have a new button that says Activate. Go ahead and hit it.
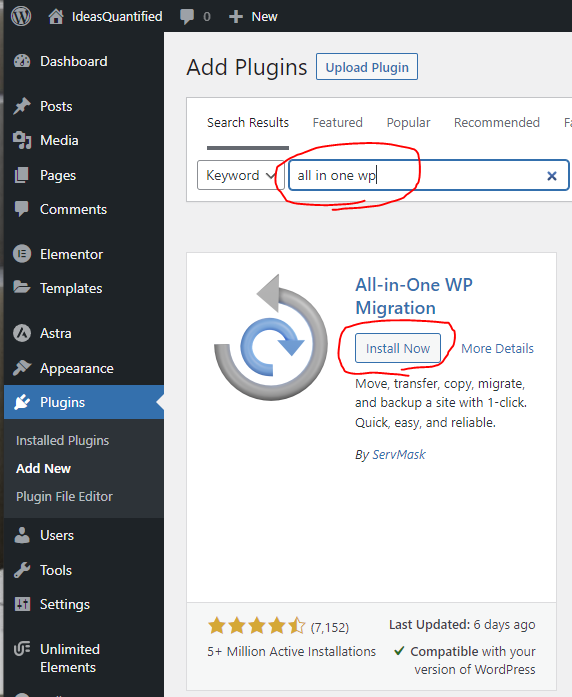
Now enter in All In One WP for the next plugin then click Install.
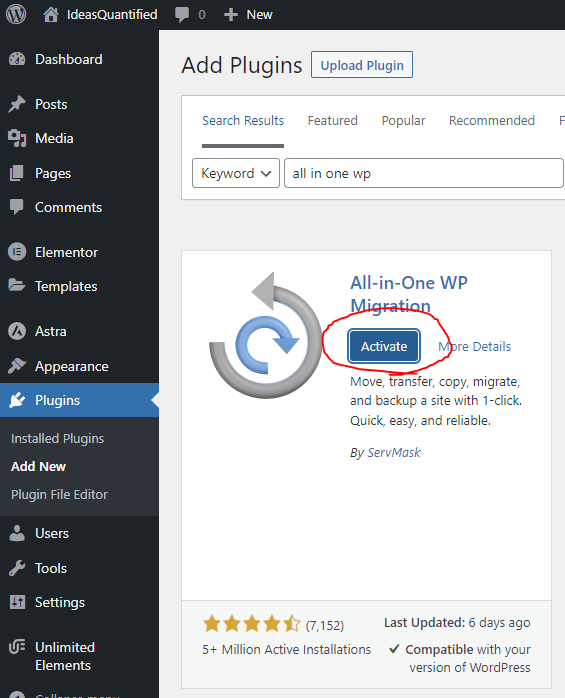
Hit Activate once it has installed.
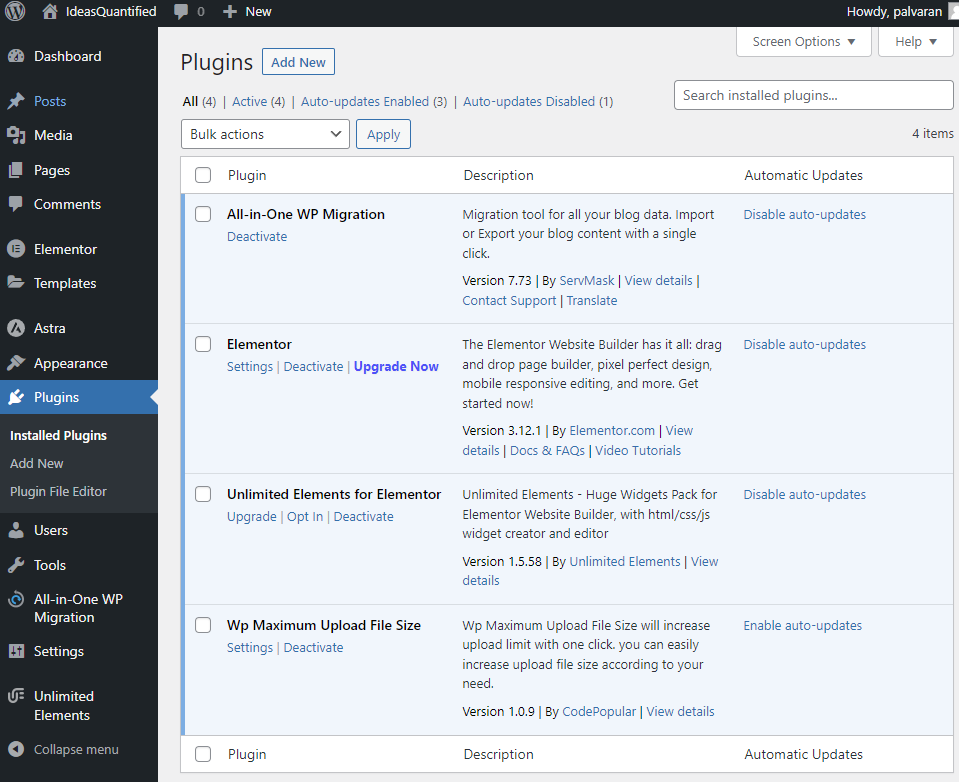
Click Plugins on the left to see the list. Pay no attention to Elementor as I went ahead and added it for my website.
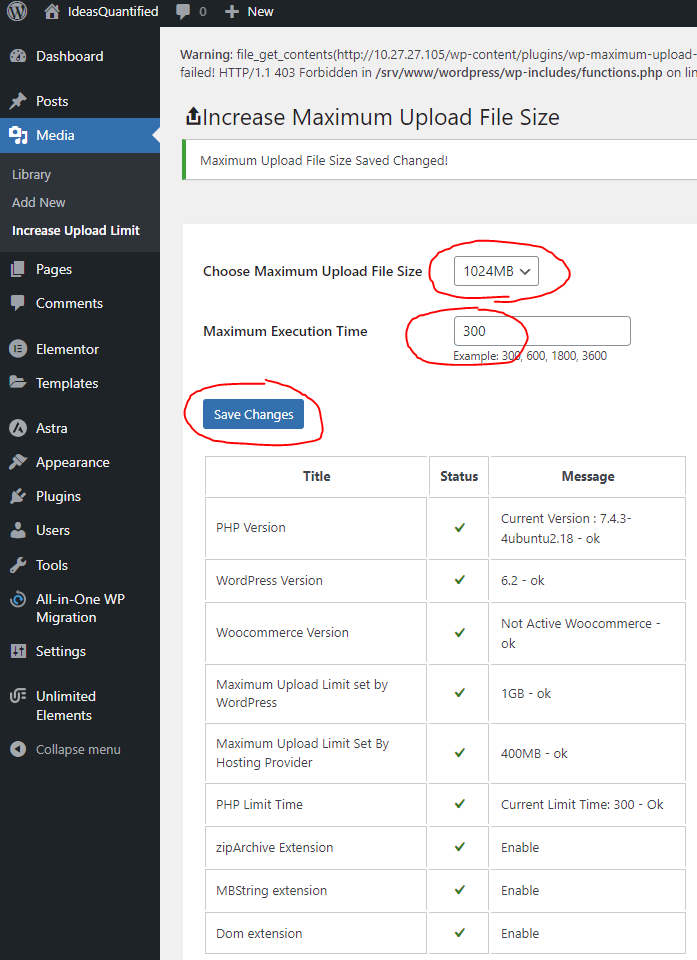
Click Settings for WP Maximum Upload File Size.
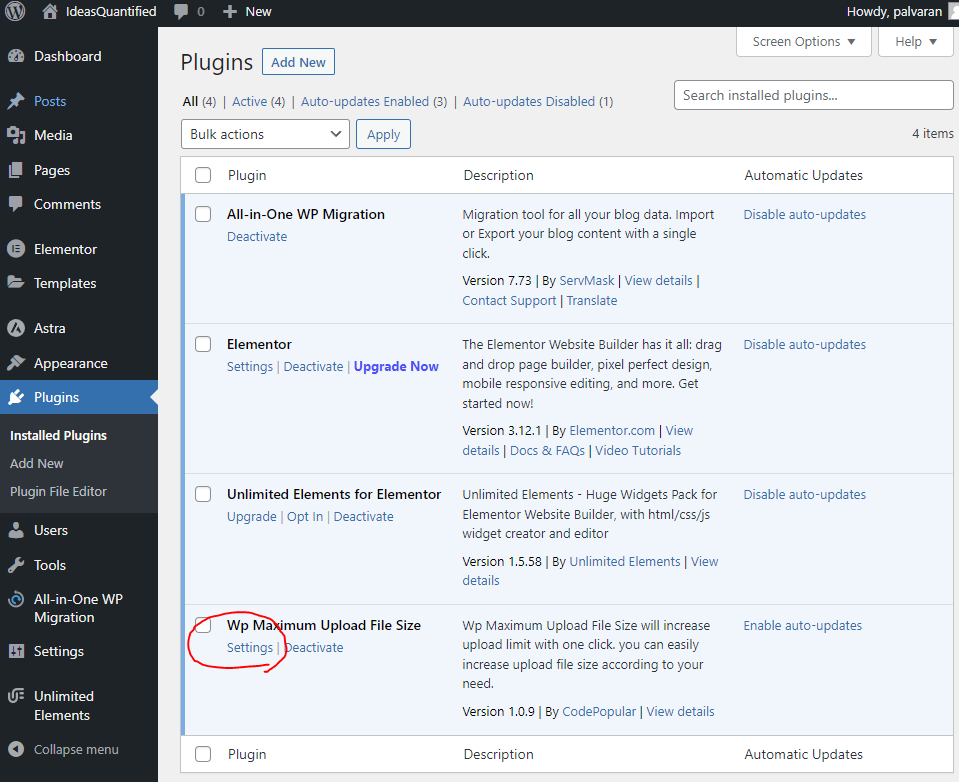
Choose a higher value for Maximum Upload File Size. I use 1024MB since my backups are 600MB. Also, increase the Maximum Execution Time and hit Save Changes.
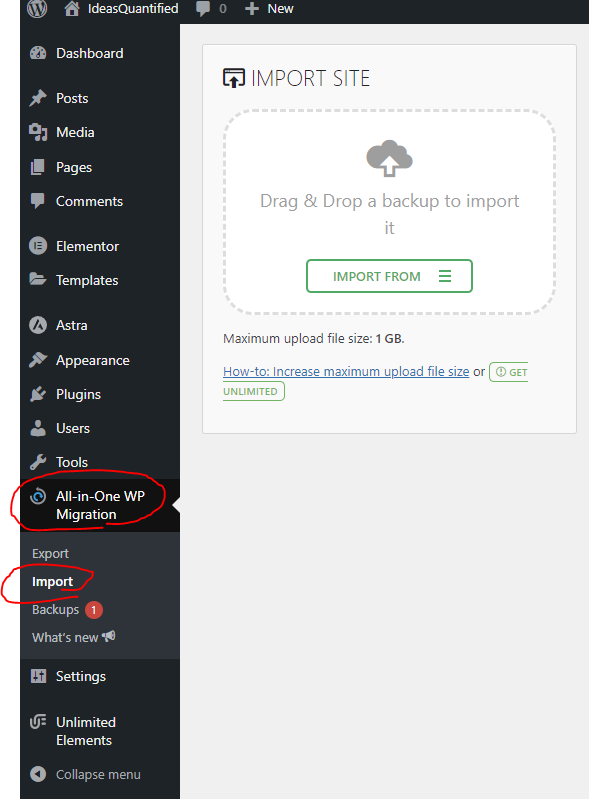
If you have another WordPress site to migrate, you can export it from the other site to the new one using the Export function. Then, import it to the new one.
Ok, now let’s continue on with getting SSL certificates working. This part was tricky for me as I had only done this in Windows or using the AWS tools on their VMs, but I wanted to be thorough in the documentation for this process to help the next person that is wondering how to do it.
Setup SSL Certificates
Start by updating the OS again.

In case you missed it, install the firewall package.

Update the firewall to allow for SSH traffic on port 22.

Update and allow traffic through on port 80.

Update again and allow traffic on port 443.

Go ahead and enable the firewall with the newrules.

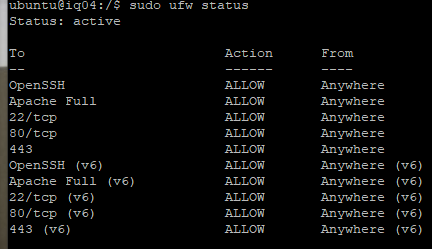
Let’s verify that it is updated and working.

Presto. We are good on the firewall front. There are some redundancies which we can clean up, but all ports are secure outside the system except for 80, 443, and 22. If you wanted to, you could use a NAT or even put a Load Balancer in front of the Virtual Machine so that no direct incoming requests are able to hit the system.
Now, remove certbot if it is installed as we are going to use a containerized Snapd package.

Go ahead and install the certificate bot.

Nearly there.

Before we request the certificate, let’s point our domain at the new server. First, we need to verify our IP again. It is statically assigned and reserved automatically, but I still like to check because reasons.

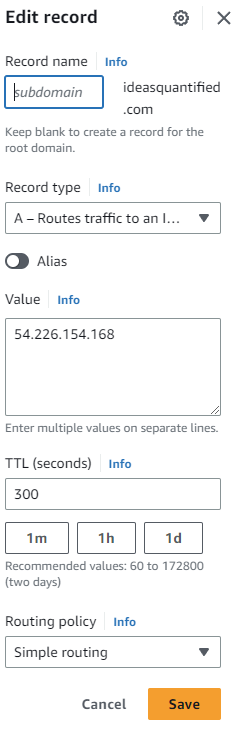
Now, go ahead and login to your networking console that manages your domain. In my case, I use AWS Route53.
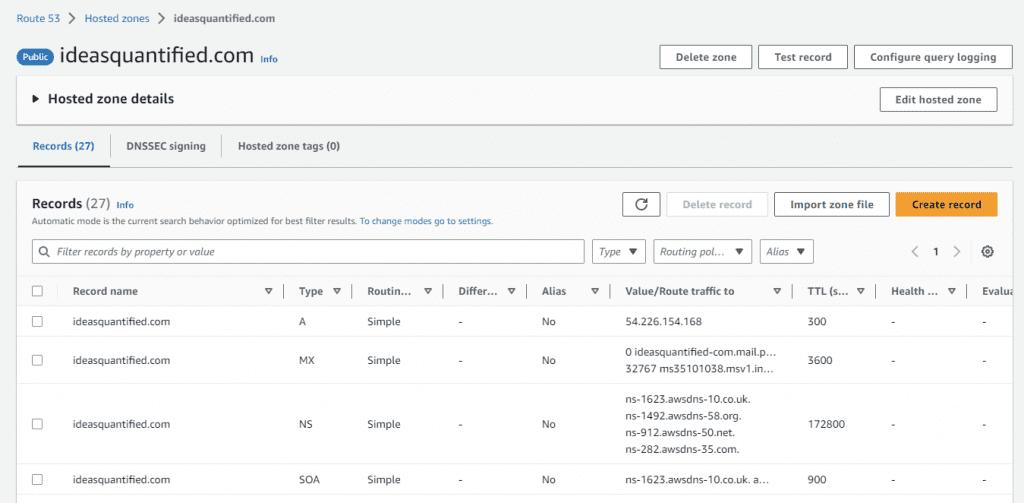
In AWS land, it is as simple as choosing the record, hitting edit, and putting in the new IP address.
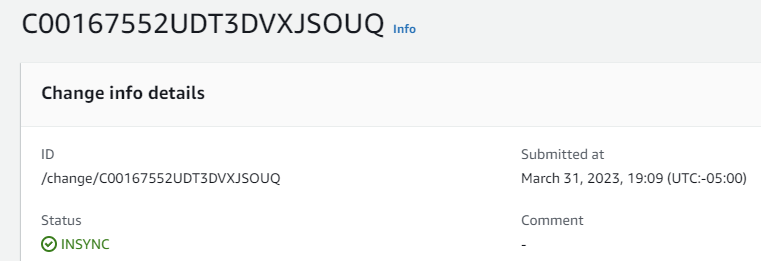
You can watch and wait for the sync, but it goes very quickly.
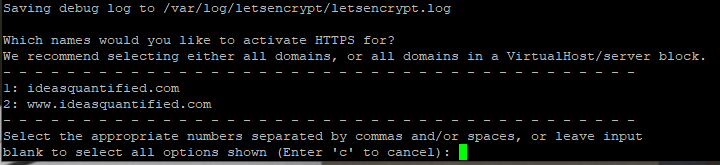
After verifying that our website is no longer working and is pointing at the new IP address, we can finally try to get a certificate.

Enter in the website and alias websites.
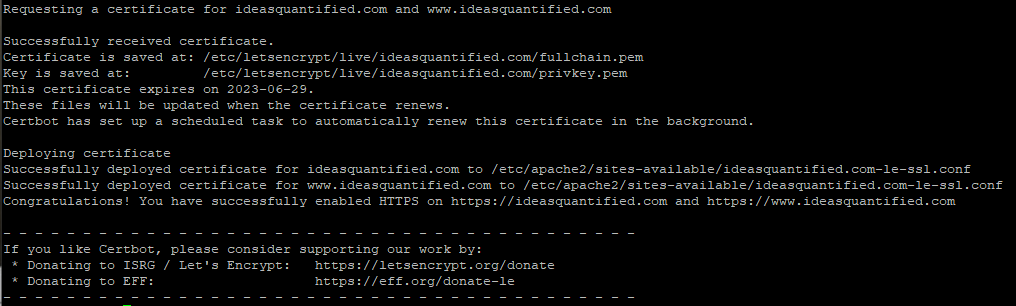
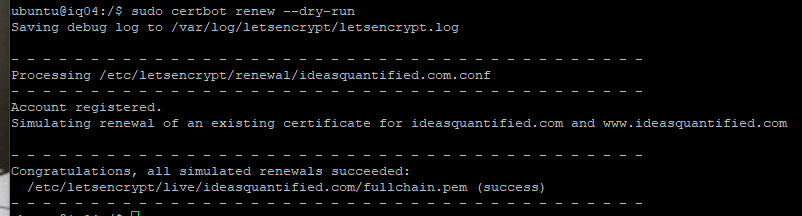
Awesome. It received the certificate and placed them in the following locations. Remember those locations in case you need to reference your Virtual Host inside your guest. Later on, for troubleshooting purposes, make sure that those locations are listed in your /etc/apache2/sites-enabled/000-default-le-ssl.conf file.
Use the dry run parameter to verify that you can get a renewed certificate in the future. This is important since Let’s Encrypt gives free certificates, but with a maximum time of 90 days. However, you can build a recurring CRON job to do the work of requesting a renewal for you.
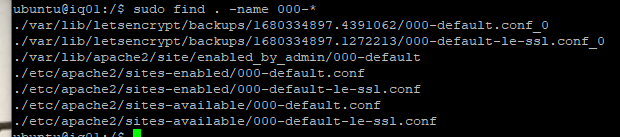
Now that we have the certificate, let’s make sure our website is updated to use those settings.

If you are unsure, you can CD to the root directory and then run the find command.
Here is a big key that I missed in the previous attempts at documenting this. Make sure that ServerName and ServerAlias are there and especially important is that DocumentRoot points at the location of where WordPress is. Also, make sure that the SSL certificate locations are correct from when the CertBot requested them.

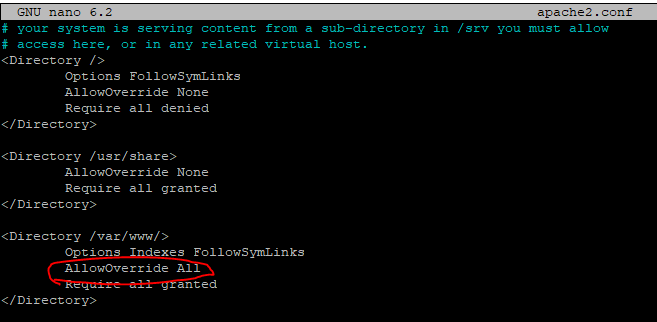
Another tip, make sure that the AllowOverride is set to All and not None for the /var/www. Let’s check the Apache configuration.

I had to update mine during one round of writing this article.
As always, anytime you make a change to Apache, then it is good practice to go ahead and reload Apache.

One final tip, I also had to update the permissions for my WordPress folder so make sure that you do that too.

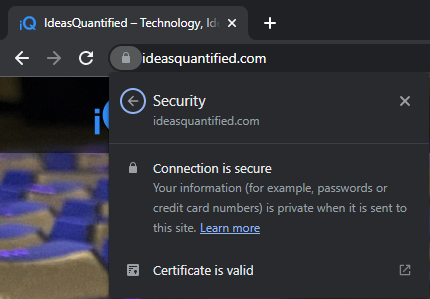
Now, we are ready to check to see if our certificate is working in a web browser. I always like to test in a cookie less browser. Let’s try InCognito or InPrivate Browsing and navigate to the site to check for the lock icon.
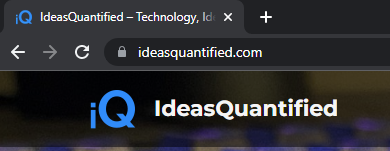
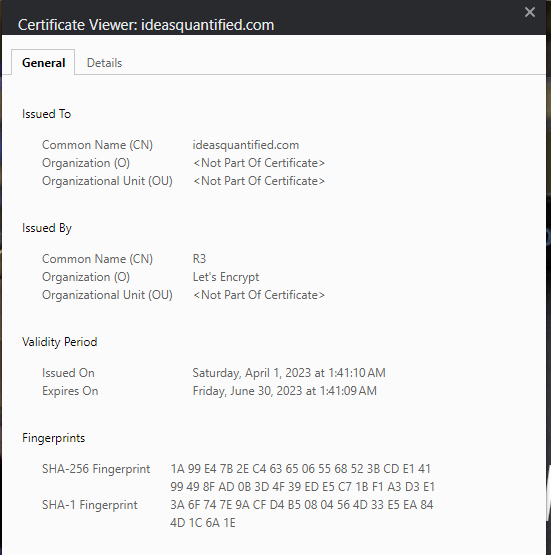
Looks good, but we still need to examine the certificate.
Let’s just make sure of the renewal date and Issued Organization.
Summary and Closing Thoughts
Whew. It seems like a lot, but it does go fast once you do it a few times. Honestly, the documentation takes a considerable amount of time in order to help explain everything. It took me four revisions to make this article as I was constantly tweaking and learning what worked and what did not work. Some of the problems I had were with getting an ARM processor for a VM, getting SSL certificates to work, and using All-in-One WP Importer to migrate my old WordPress website to the new server. However, each time I updated the documentation and gave it another attempt and refined my documentation and workflow.
In the end, we were able to migrate our WordPress server from AWS to OCI and spin up a new server for free in the Oracle cloud. The new server has more compute, more memory, and more drive space and speed. We were efficient and even trimmed our budget. All in all a successfull migration.