
TL;DR: I figured out how to override and stop YouTube Shorts. It’s harder to block a specific website element as opposed to an entire domain.
- Dangers of short attention span
- DNS vs URL Filter
- TLS Decryption
- Journey to find the right solution
- Setup Cloudflare Gateway
- Setup Firewall rules
- Configure your endpoint
- Closing Thoughts (With Video)
Dangers of short attention span
Social media has served to bring many of us together proving the potential importance of it and the good it can achieve. However, it has also proven to have dangerous ramifications with one of the most serious being an inaccurate perception of reality as well as a distorted sense of truth. The results can be self harm in some and isolation for others. Factoring in that social media is designed for staying on the platform using positive and negative feedback as evidenced by likes and all information should be carefully considered when reading.
That said, I prefer long form journalism and am not a fan of ultra short form writing in the case of Twitter/X with its 140 character limit. It has value in being able to point to other forms of media or information, but in my opinion it is a poor choice for conveying complex ideas due to the inherent design limitations.
Additionally, it is my belief that short form content and the feedback processes implemented within social media contributes to the continued cycle of ever increasing rates of attention deficit disorder (ADD) and attention deficit hyperactivity disorder (ADHD). Did you know that with each generation, there are increasing rates of ADD and ADHD as evidenced by the CDC.

It is possible that these rates are due to increased awareness, but regardless, the data shows an upward trend. Factoring in short form content in the Case of Social Media and Teen use and it is only serving to harm our youth. I believe YouTube Shorts, Facebook Reels, and other short videos only contribute to this problem. Therefore, without an option to disable YouTube Shorts, I challenged myself to see if one person could do something about it. In this case, I tried to break YouTube Shorts.
First, let me say that I really like YouTube and it has some good merits. It helps content creators such as the Auralnauts reach their audience, individuals like Brent Underwood at Cerro Gordo to educate, teachers to teach, and entertainers to entertain. I just think that until YouTube implements an option to disable YouTube Shorts or at the very least a parental control option to moderate it, that I wanted to give others the freedom to be able to make the choice for themselves and their family.
So how do we break YouTube Shorts?
The short version is that you need to setup specific HTTP Firewall rules that include TLS decryption and use a regular expression to match the pattern that Google uses. If that sounds like a lot, don’t worry. I will break it all down. As my old boss used to say, “everything is hard until you figure it out.” For those that are not familiar with those terms, let us start with some core tenants that I hope will help.
DNS vs URL Filter
If you are reading this article you are already familiar with DNS and translating a URL of a website into an IP address. You probably also are familiar with the idea of PiHole. For those unaware, PiHole is a free piece of software that will blocks ads and speed up your web browsing by simply not downloading the data from ads or other pieces of spam. You can even install it in the cloud and browse faster on the go.
This works wonderfully for the majority of cases. However, the limitation of DNS Filtering is that while it blocks an entire domain, it is incapable of blocking a specific subdomain or a specific website underneath the domain. For example, let’s say you want to allow Reddit, but not one of the subreddits. In the case of PiHole, it would be all or nothing. No Reddit for you!
Enter URL Filtering. URL Filtering works differently in that it allows for multiple choices by using different Selectors, Operators, and Values.
So what is that? I like to think of things in philosophical terms and break them down to their base elements of who, what, where, when, why, and how. In this example, a Selector is where we want to check, an Operator is how we want check, and a Value is what we are checking. Now let’s break that down further.
Where we want to look can be in many places, but in my quest I narrowed it down to these four Selectors: URL, URL Path, URL Path and Query, and URL Query.
How is the relationship between the Selector and Value. Does the criteria match? Does it not match? How does it match? The choices are: is, is not, in, not in, matches regex, and does not match regex. How we want to check will depend on what we find, but a good safe bet is matches regex.
Value is what we are looking at specifically such as a URL or attribute.
Now let’s go through some examples to see how they compare.
URL will block a specific URL or webpage. A generic example is “https://reddit.com/r/gaming”. If you choose “is” for your Operator then this will allow the rest of Reddit to continue to be searchable. i.e URL is “https://reddit.com/r/gaming”.
URL Path will block a directory or path underneath the domain or website. For example, “/r” would block all subreddits underneath Reddit, but if there are other websites out there that have a “/r” in their path it would break them too. ie. URL Path is “/r”.
URL Path and Query will block based on different matching criteria. For example, “/r/gaming?sort=top&time=day”.
URL Query is where a lot of the granularity and power resides. For example, you can do “m.reddit.com/r/gaming” which seems to overlap with the others, but Query also looks at the payload of the packet to get other data. The one trick is that to do that, you must have TLS Decryption enabled. So what is that?
TLS Decryption
We all know that websites usually have a lock icon next to their name. This indicates the website has a certificate and is encrypting traffic which is good. That way someone can’t listen in and intercept the information we are sending such as usernames, passwords, or other personally identifiable information. TLS Decryption is the process of intercepting and inspecting some of the network traffic, decrypting it, analyzing it, and then re-encrypting it again with another certificate. Typically, this is done to look for malware or security risks. Think of it like the TSA checking bags for possible hazardous materials. So how does that work for our scenario?
Inside YouTube, right click a video and choose copy debug info.
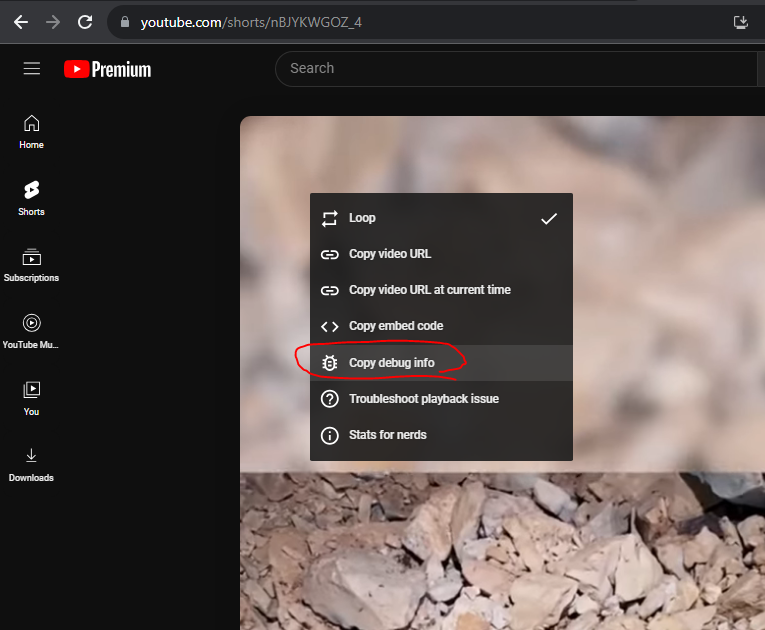
Then paste that into Notepad or your word editor of choice. Let me show you a couple tidbits we will come back to.
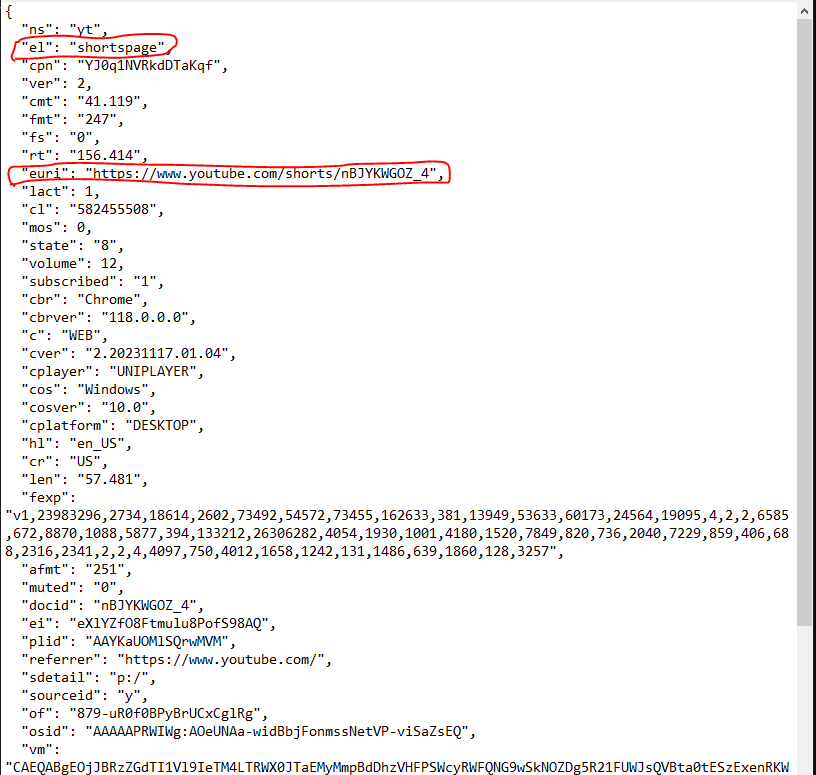
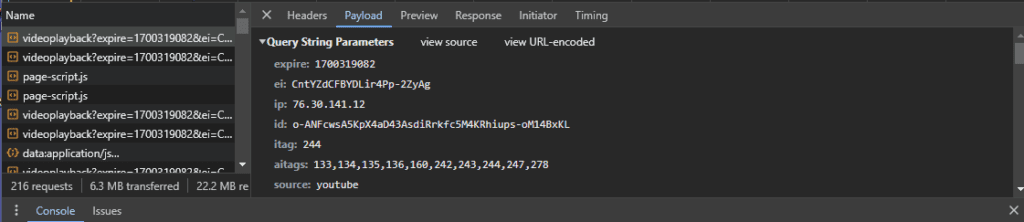
Some other interesting things, “el” is a descriptor for shorts. “euri” is the descriptor for the URL. Now let’s check out what the developer tools show. In your browser, hit F12 and navigate to the video. Click the Network tab. Click Size does that it sorts descending by pointing downwards. Then, hit F5 and reload.
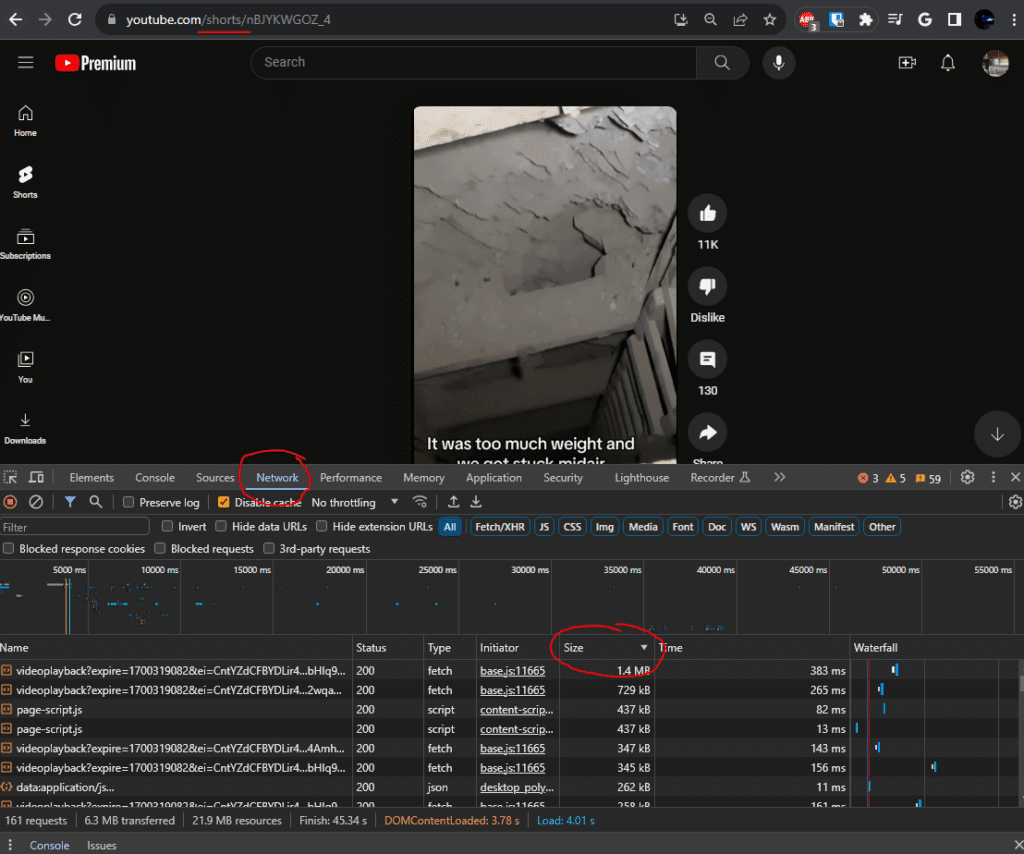
At the top you can see the URL Path for “/shorts”. If you think you can use this to Block YouTube Shorts, good guess. That was my first attempt too, but sadly it did not work. Left click on the top file that has the largest size.
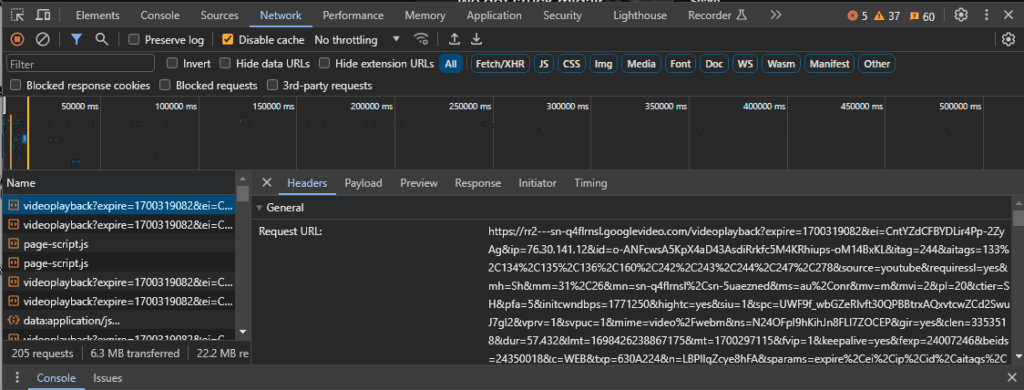
It looks like gibberish, but has data regarding various attributes such as expiration, mimetype, etc. Click Payload and it will show it in an easier to read format.
Now, here is the part that took me awhile to figure out. I used the process of elimination to compare search for fields that matched or did not match up. For example, here is the debug for a short and a non short.
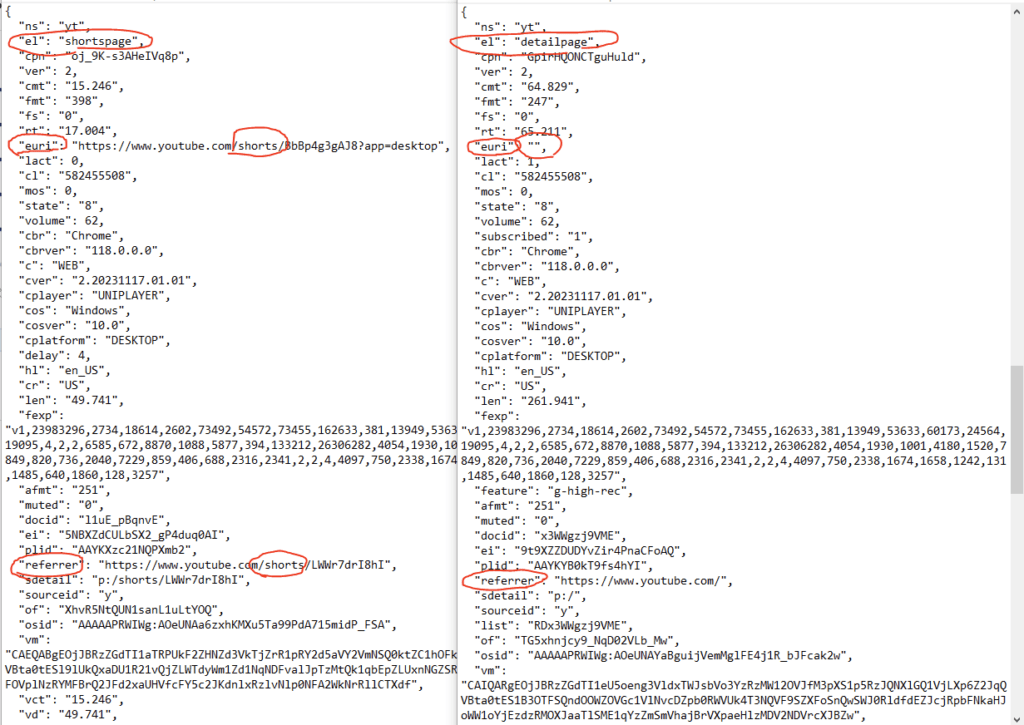
I tried making firewall rules that targeted “el” and “euri”, but without success. Eventually, I just started to read the string and look for a pattern that someone might enter. Then I saw the SH value and thought that would be a good fragment to try.
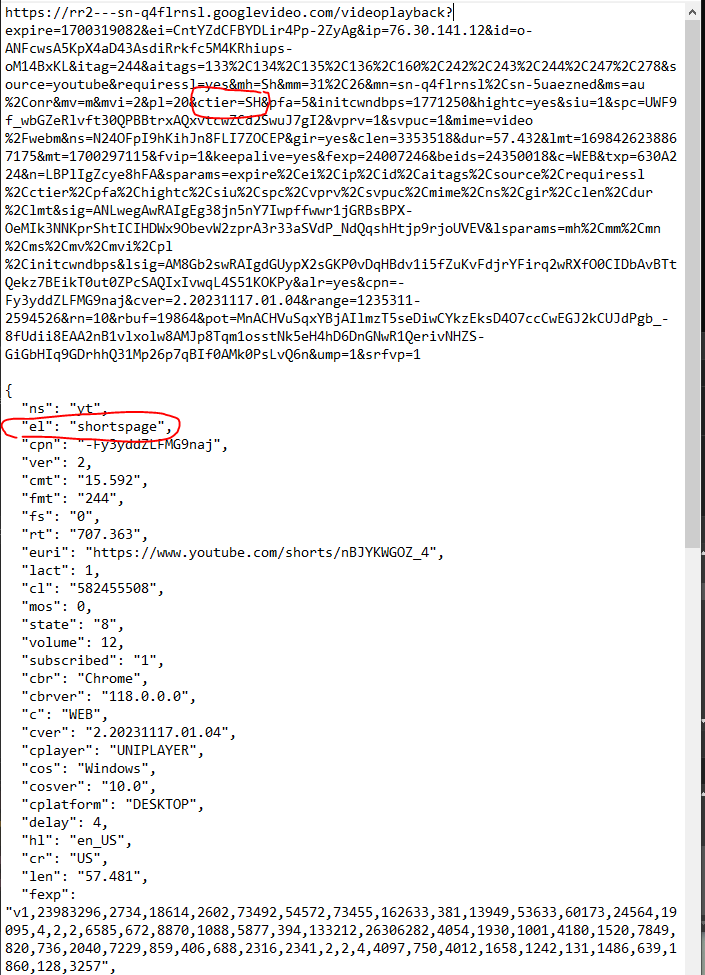
Spoiler warning, that turns out to be the secret sauce. Now how to we begin to use that information anyway?
Journey to find the right solution
Finding an option to do URL filtering is tough. At first, I tried modifying Pi-Hole as I have it installed in a few different places. Unfortunately, it is only capable of doing DNS filtering. Next, I tried out the company DNSFilter as their pricing is fair at $4/month and they have their own datacenters. However, after trying them out, they do not do custom URL filtering either. Afterwards, I decided to modify my pfSense router. I followed this guide to download the plugins for Squid, SquadGuard, and Lightsquid, generated my own certificate, enabled SSL Inspection, and setup firewall rules. Unfortunately, I ended up corrupting my router configuration and had to restore. Thankfully, I took a backup prior to doing the modifications.
That brings up a key lesson. Always, always, always backup your system or the work you are doing before you make any modifications. That way you will always have a back up option. Like the old adage goes, it is better to have something and not need it than to need something and not have it.
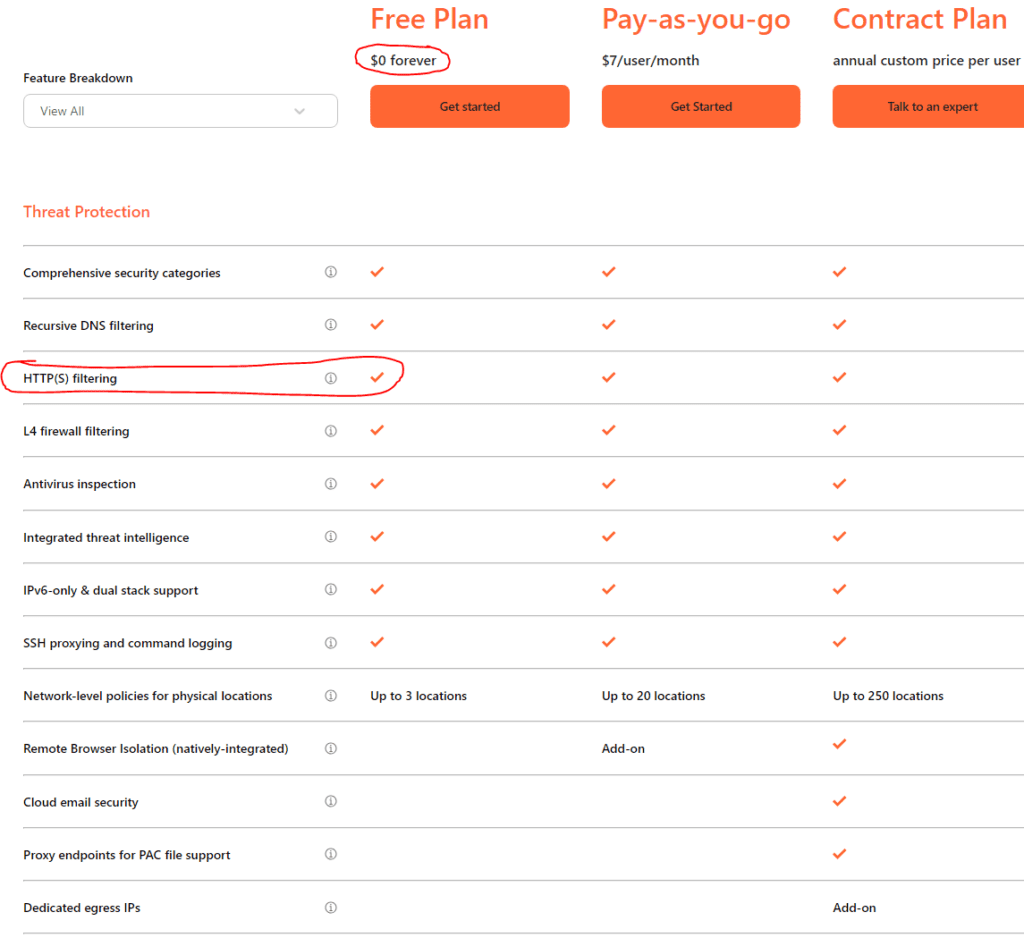
After not having any success I ended up trying Cloudflare Gateway. I thought that being free, it was a good way to try to build a working prototype if it did what it touted. Also, as far as I can tell, there is no limit at the time of this writing after a week of usage. That said, I would be willing to pay $7 per month to block YouTube Shorts as well as ads and other unwanted content.
I have to give kudos to Cloudflare as they have a really good guide on how to setup their product. The high level process is the following:
1. Setup an account as that is how you use the Dashboard to control the Firewall and other settings.
2. Choose a Team name which is the location where all of your devices, users, and rules will live within.
3. Choose your subscription model. I used Free. Note, you do need to enter a credit card, but it does not charge it.
4. Install the WARP client on your device.
5. Install the Cloudflare root certificate which allows you to use TLS decryption to look at the payload and response from certificates and API requests.
6. Modify Dashboard and setup firewall rules.
Ok, so let’s get cracking.
Setup Cloudflare Gateway
Once you create your account and login, it will look similar to this minus the DNS queries.
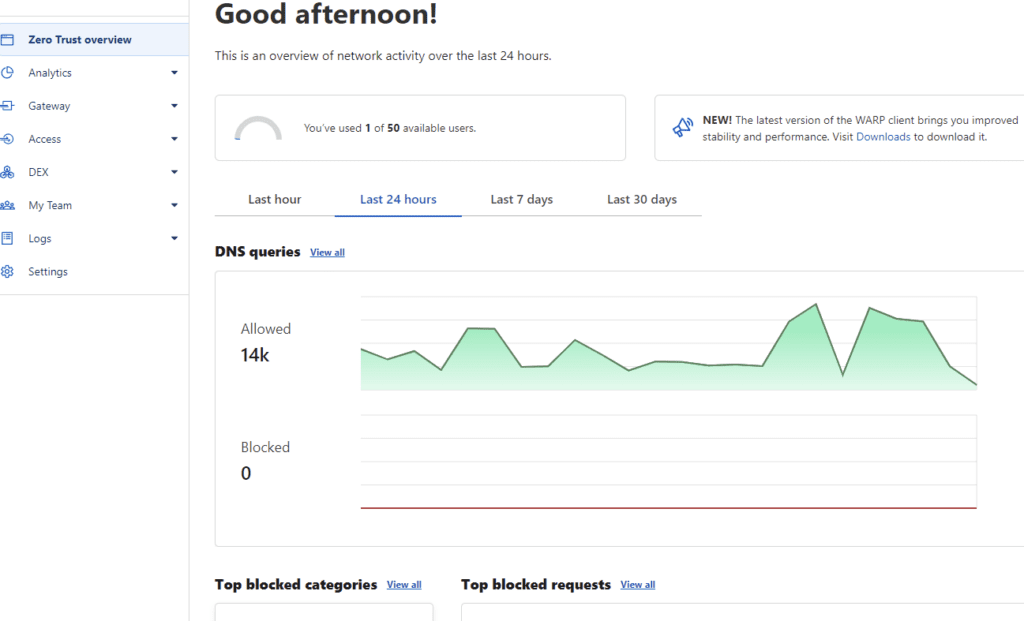
Navigate to Settings, Network.
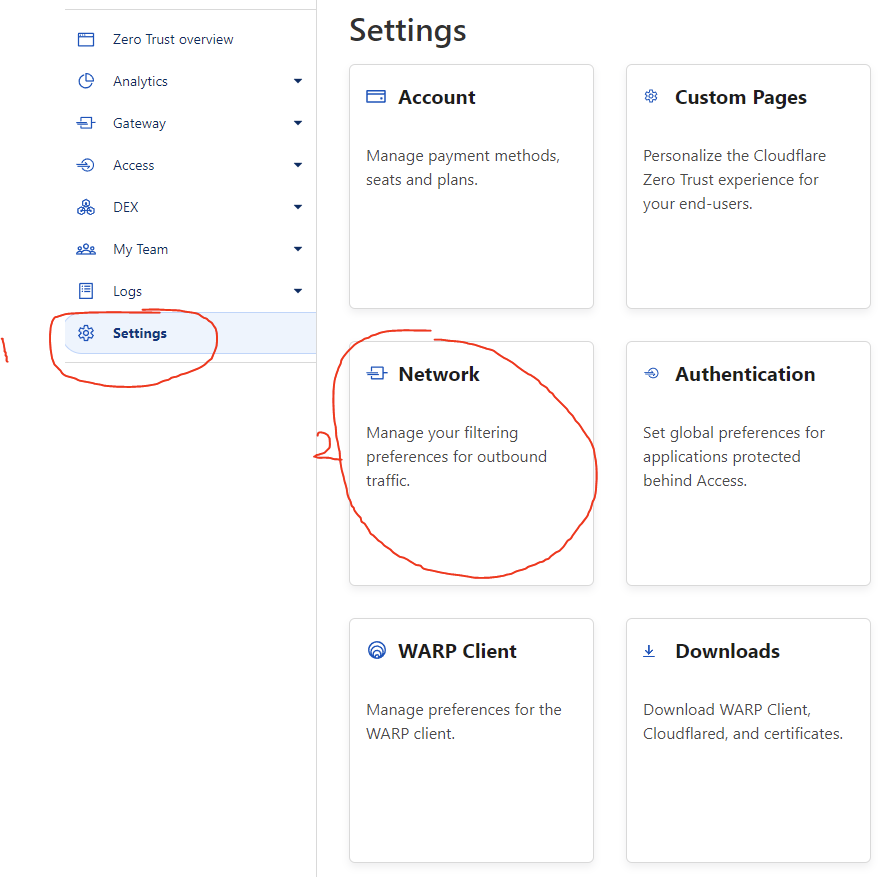
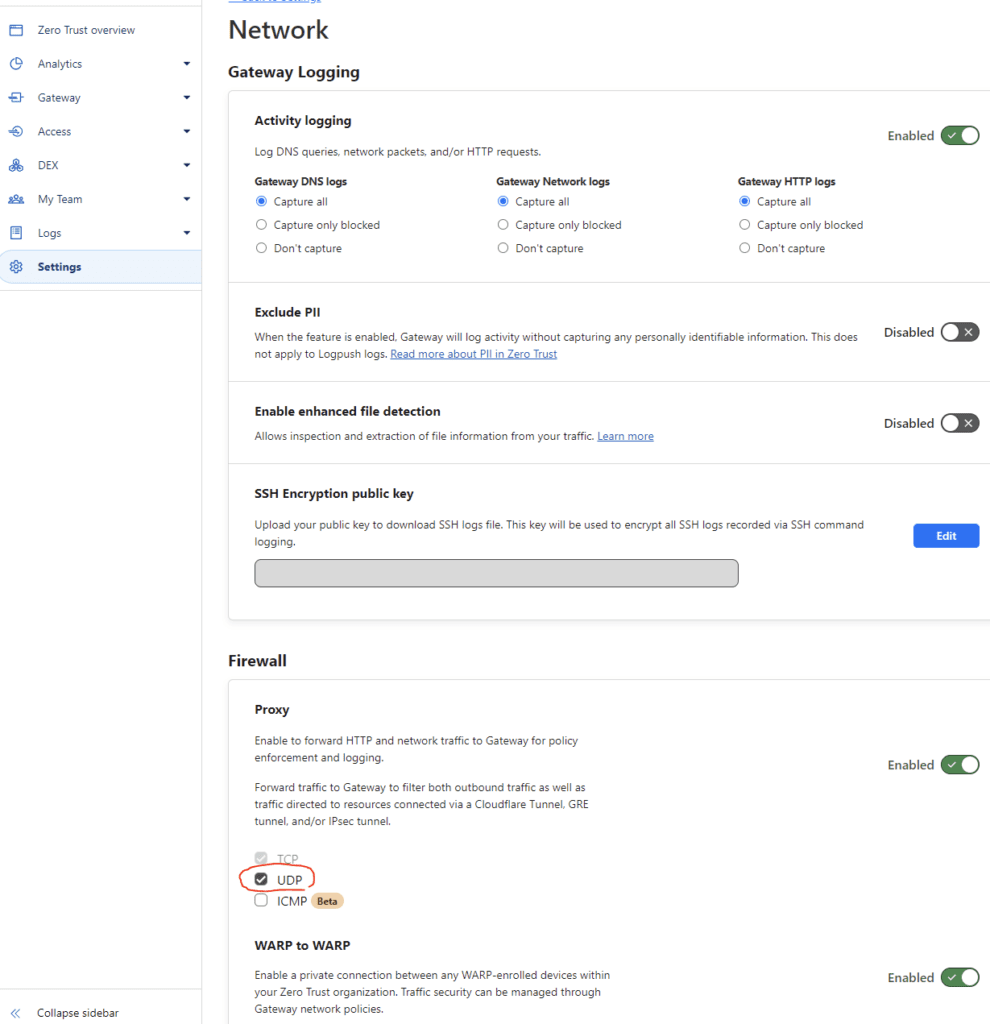
Enable Activity Logging, capture all logs, enable Proxy, and turn on UDP. Capturing the logs is highly important as it will allow you to see what is working and what isn’t and by seeing what policies are applying. Remember firewall policies are applied based on the lowest numerical priority. This is important if you have a lot of policies and are having trouble understanding the behavior.
Navigate back to Settings and then WARP Client.
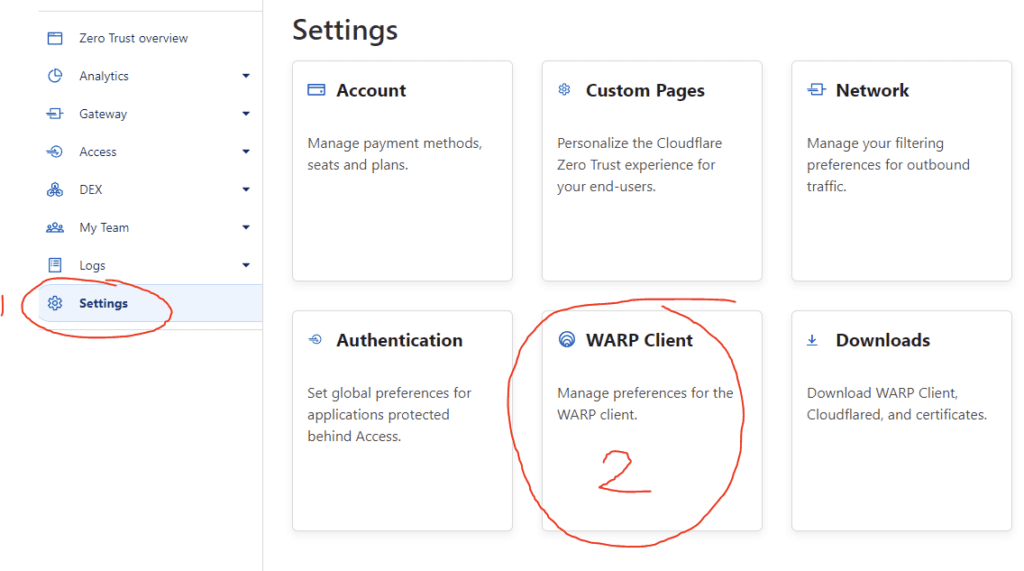
Inside WARP Client, enable the policy to Install CA to system certificate store. This is important for decrypting HTTPS traffic.
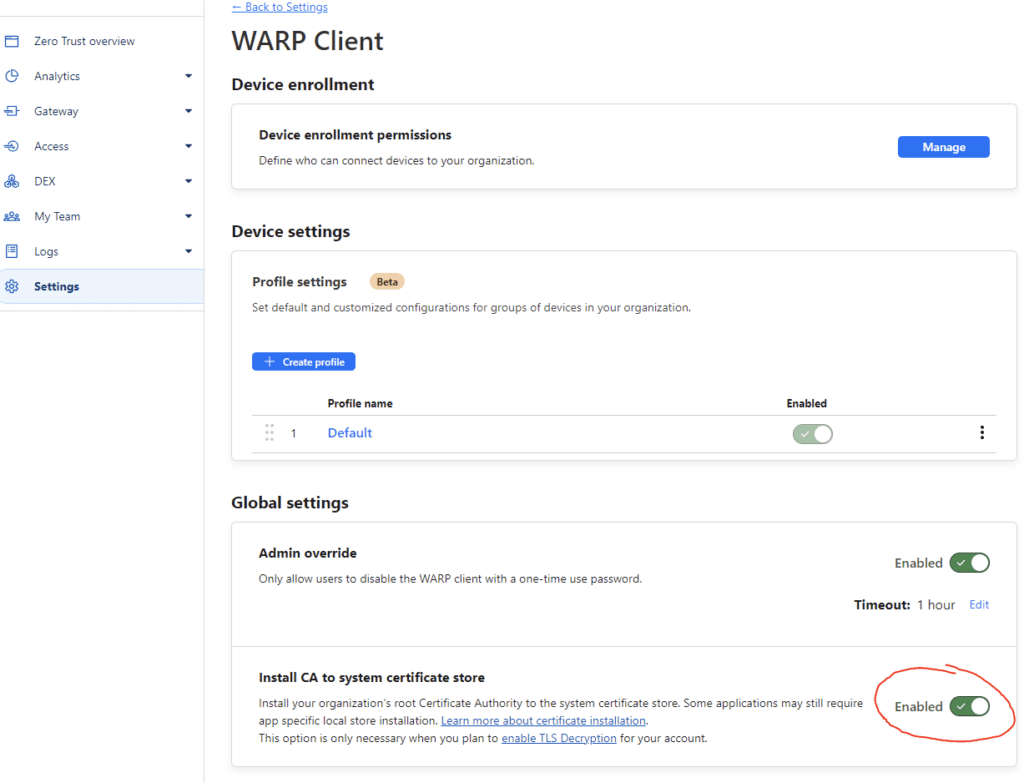
That’s it for the general settings. Now let’s go configure the firewall policy.
Setup Firewall rules
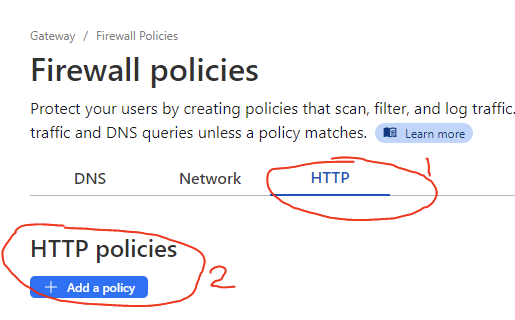
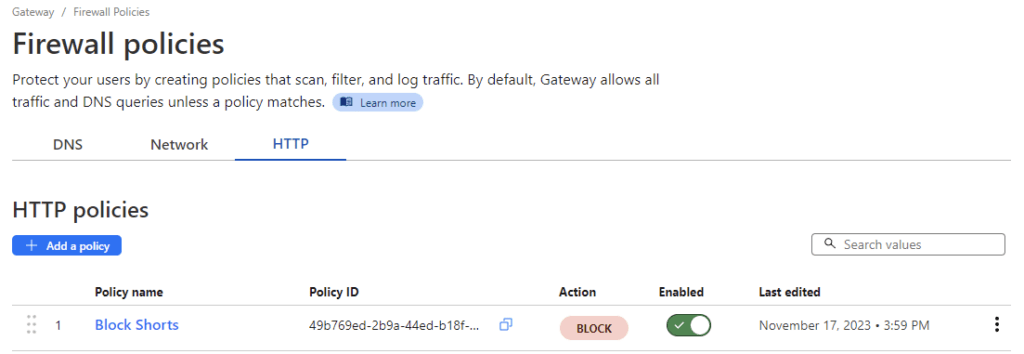
First, navigate to Gateway, then Firewall Policies, then click HTTP. Don’t worry that it says HTTP and not HTTPS. Because we have TLS Decryption enabled is effectively the same thing.
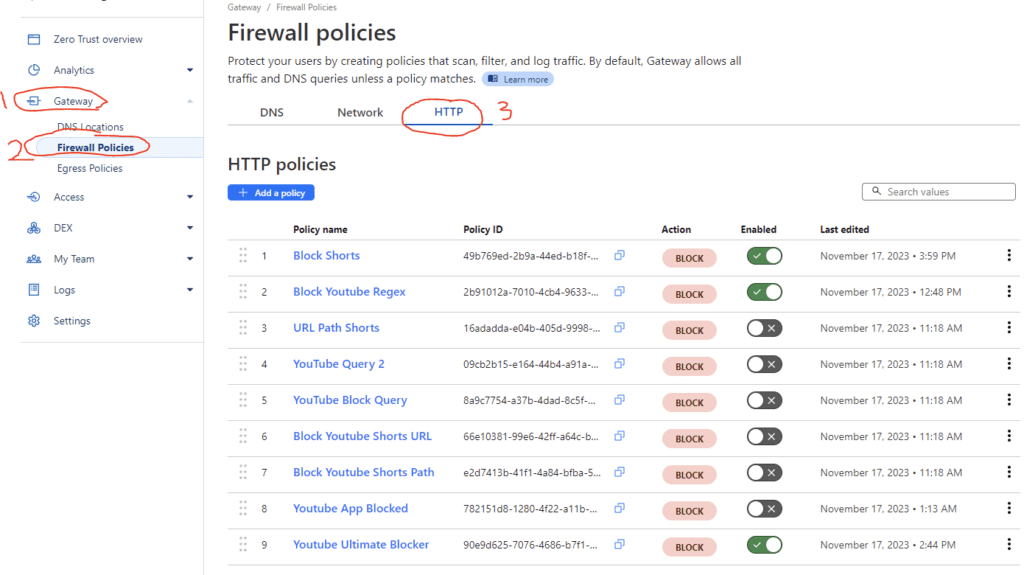
I made many variations of testing to see what worked and what doesn’t. The only one that really matters is Block Shorts, but I went ahead and left the others as they were partially blocking based on what I saw in the logs. Note, the way firewall rules works is the lower the number, the higher the priority. This means that 1 will always go first so if you have several rules, then it is important to put your most specific one at the top or rather the lowest numerical value.
To create a new policy, click Add a policy.
Next, enter in a name, Selector, Operator, and Value. I used URL Query, matches regex, and “.*ctier=SH.*”. Choose block.
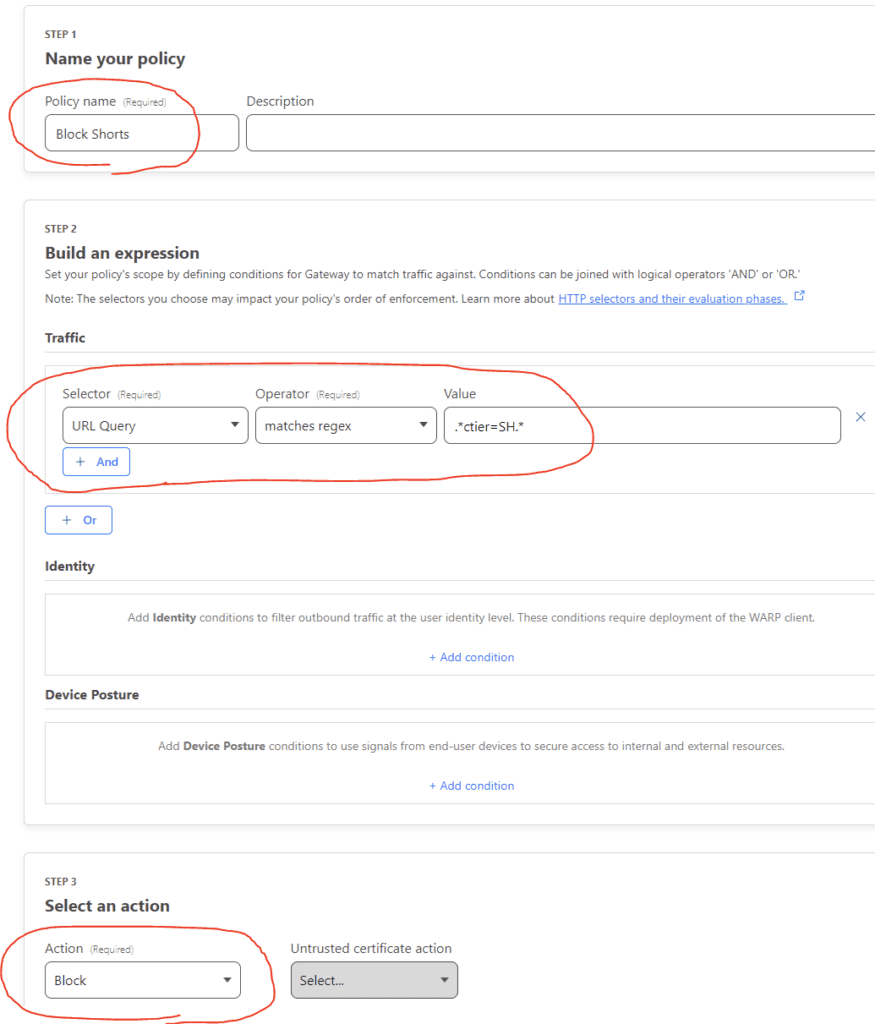
Click Save policy. it should look like the following.
Configure your endpoint
Cloudflare has agents that are available for Windows, macOS, Linux, iOS, Android, and ChromeOS. This example is for iOS.
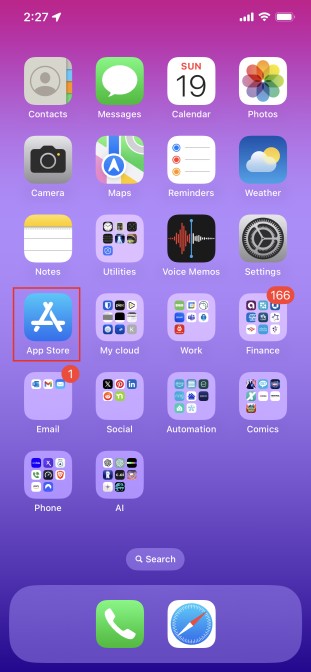
Click the AppStore Icon.
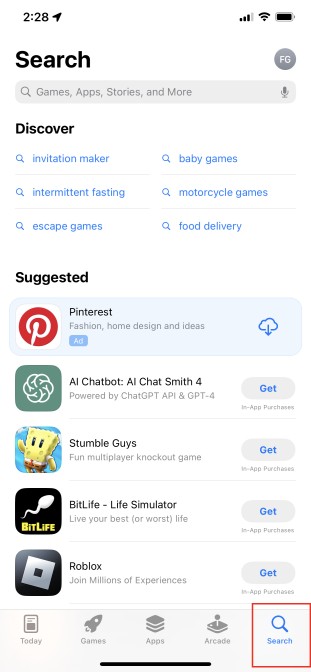
Click the Search Icon.
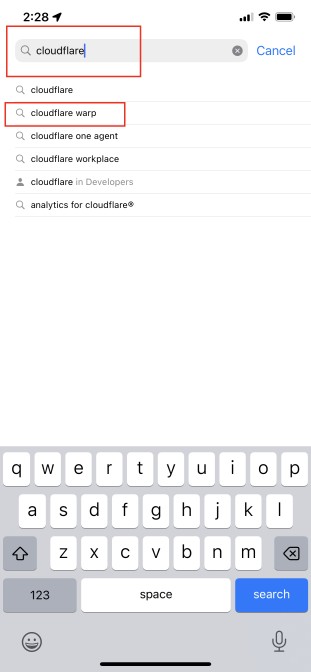
Enter cloudflare and choose the cloudflare warp choice.
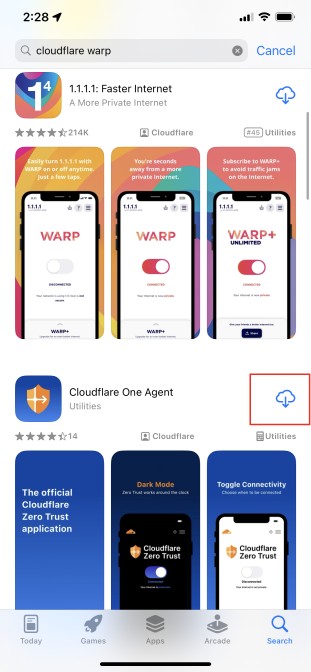
Choose the CloudFlare One Agent. The 1.1.1.1 is the legacy agent.

It will show up on your screen. Before you click it, we need to get a certificate.
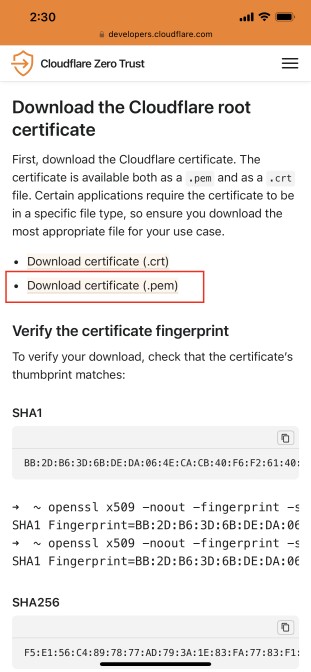
Go HERE and click Download certificate (.pem).
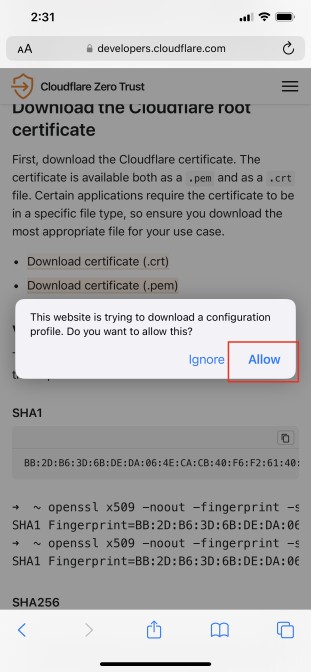
Click Allow.
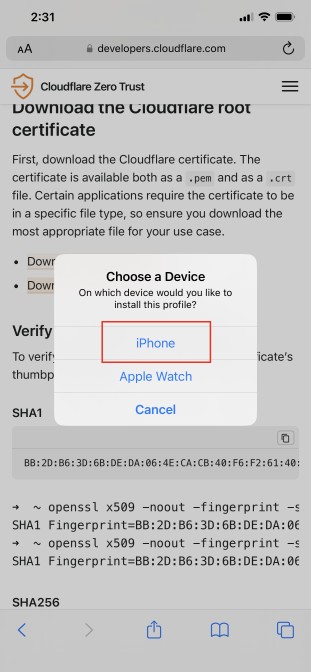
Click iPhone.
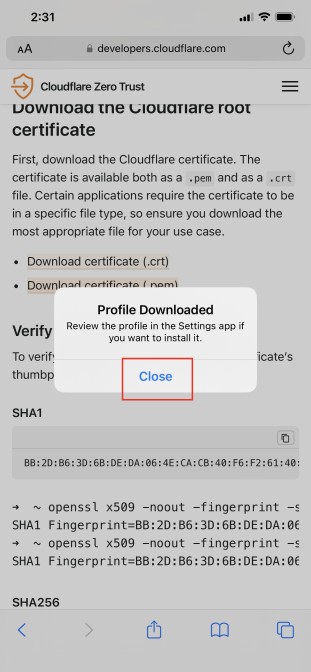
Click Close.
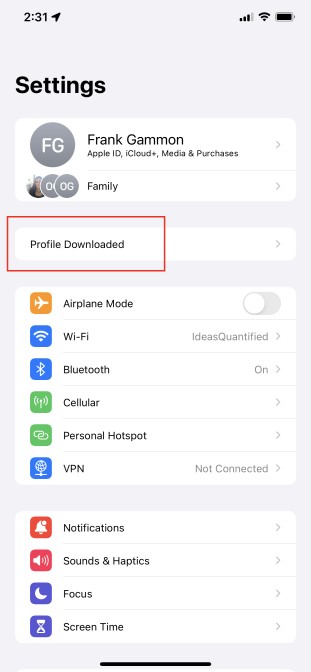
Go to Settings and you should see Profile Downloaded near the top under your iCloud account. Click it.
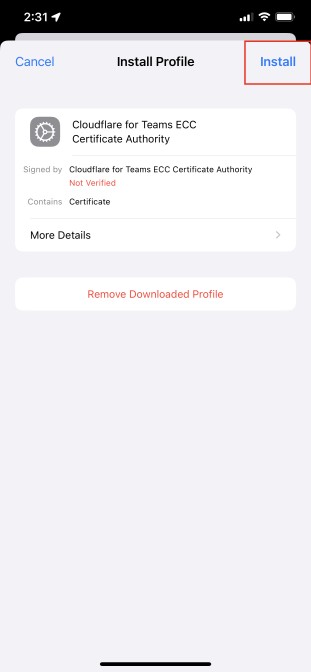
Choose Install.
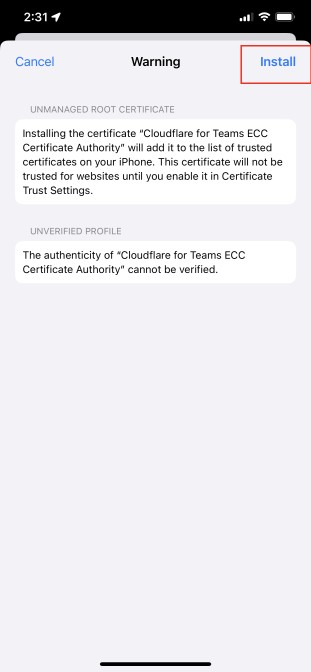
Click Install.
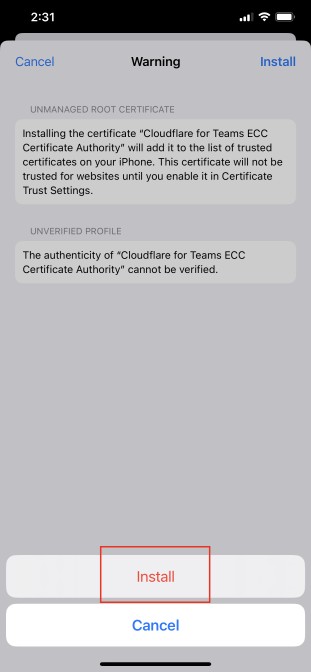
Click Install.
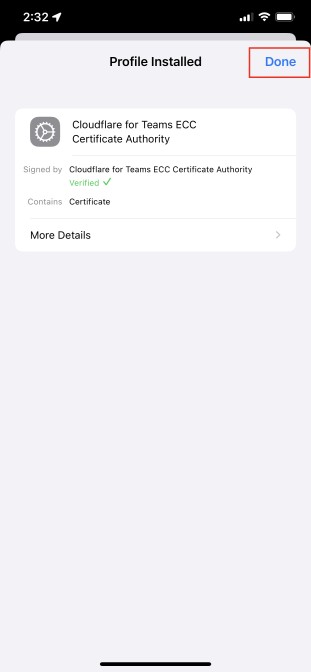
Click Done.
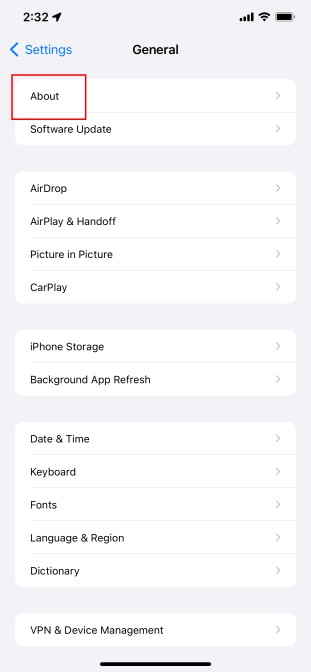
Click About.
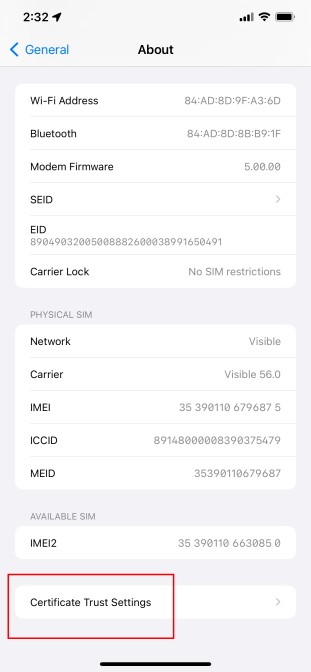
Scroll down and click Certificate Trust Settings.

Toggle the switch to turn on the certificate.
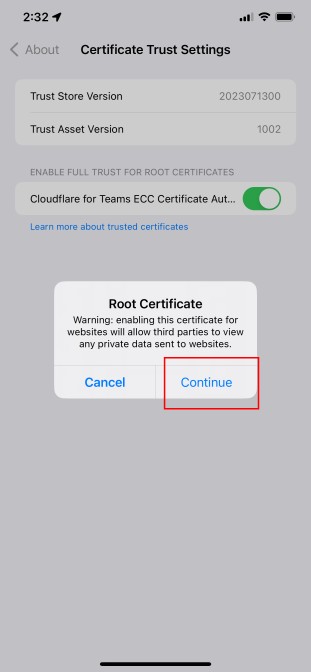
When it asks, click Continue. That’s it, now it is time to run the app.
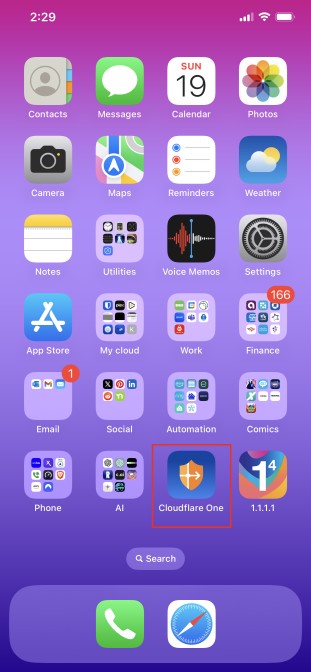
Find your Cloudflare One app and click it.
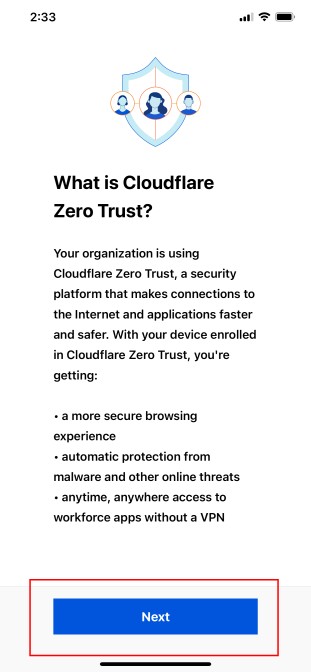
Click Next.
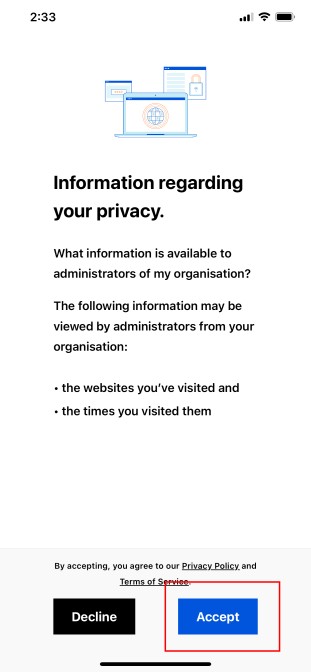
Click Accept.
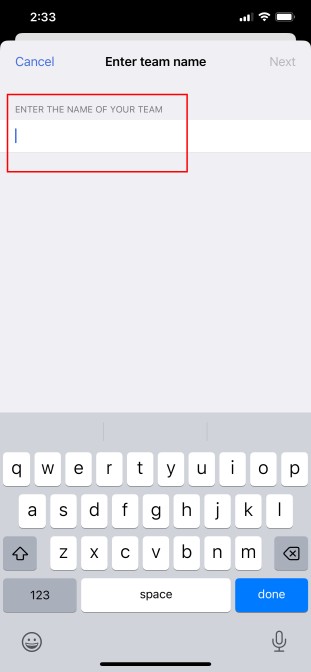
Enter the team name that you chose for your account and your gateway earlier.
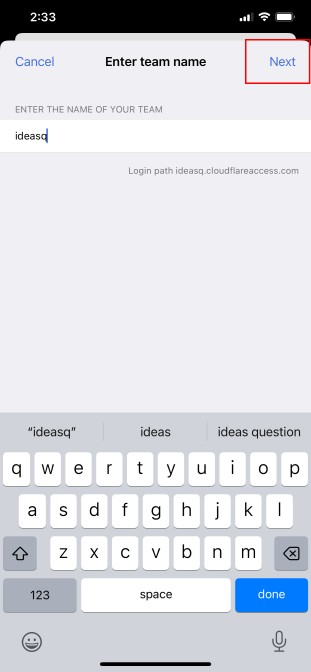
In my case, I chose ideasq. Go ahead and click Next.
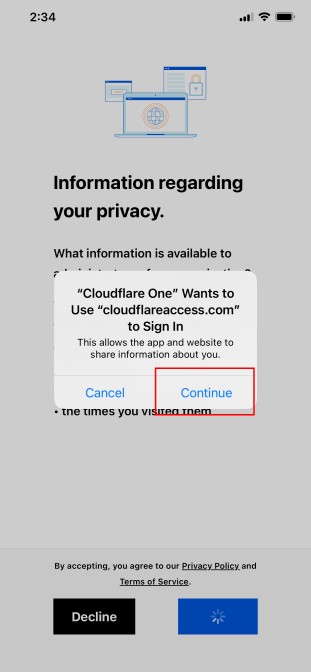
Click Continue. Sign in using the account that you made with Cloudflare earlier.
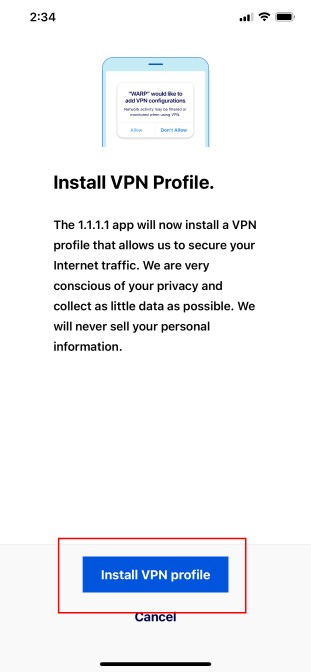
Click to Install VPN profile. This filters all traffic through your Cloudflare Gateway using your Firewall rules which are then applying to your endpoint.
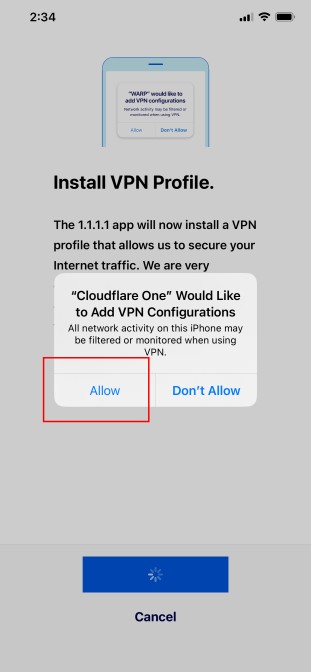
Click Allow.
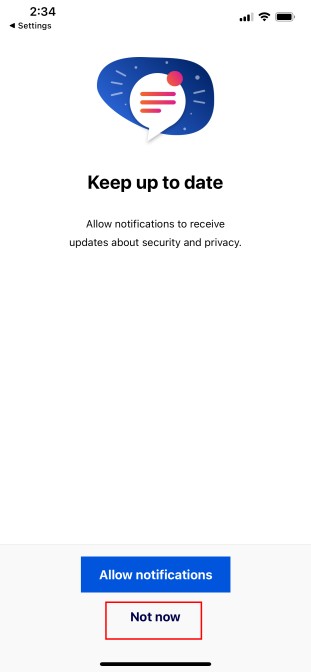
Choose your notifications. I chose Not now as I think it is more important to have less notifications rather than more.
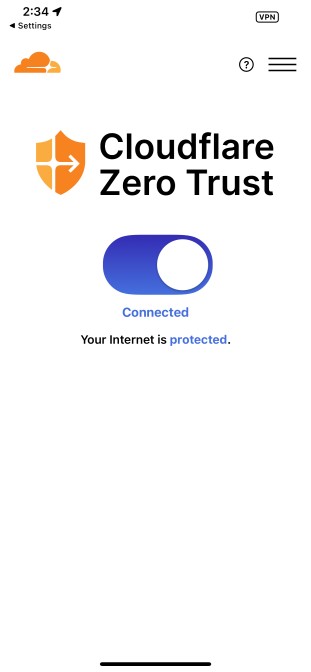
After that, it should show Connected. If you got to this far, great work! Now to test.
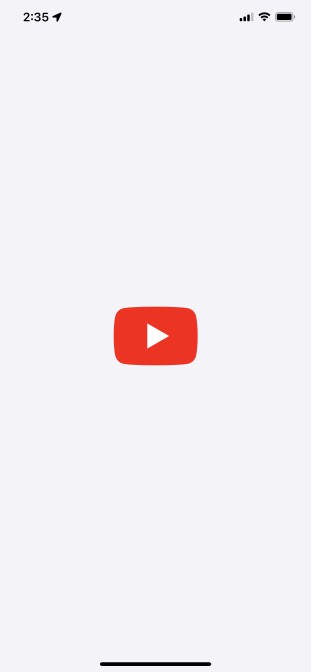
Moment of truth. On your endpoint, find your YouTube app or navigate using a web browser to Youtube and click shorts.
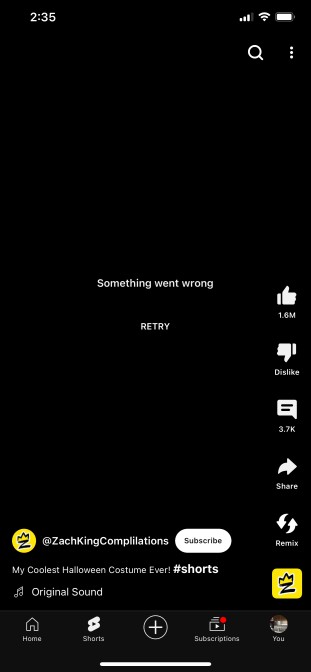
And just like that, YouTube Shorts has been HAL’d.
Closing Thoughts (With Video)
This guide is a little bit unorthodox and not for everyone, but until an option is given to disable YouTube Shorts, I made this guide to help others out there have at least one option. In this process, hopefully you either learned more about DNS, firewalls, or even seeing some of the metadata and many data points being associated with videos.
Also, for those that prefer videos, I went ahead and made a video to explain and show the process.